There’s something special about turning a handful of colorful pony beads into a cute little creation you can carry everywhere. A turtle pony bead keychain is one of those timeless crafts that never seems to go out of style. Whether you’re making one for yourself, creating party favors, or introducing kids to bead crafts for the first time, this adorable project is always a hit.
The best part? You only need a few basic supplies and a little creativity to make a turtle that’s full of personality.
Why Turtle Pony Bead Crafts Are So Popular
Turtles are one of the most loved pony bead animals because their shape translates perfectly into a bead pattern. Their rounded shell, tiny legs, and cute little head create an instantly recognizable design that’s both simple and fun to make.
A turtle pony bead keychain is also practical. Instead of displaying your finished creation on a shelf, you can attach it to:
- Backpacks
- Lunch boxes
- Pencil cases
- Purse zippers
- Duffel bags
- Key rings
Every time you spot your beaded turtle, you’ll be reminded of the fun you had making it.
Why Pony Bead Crafts Never Go Out of Style
Pony bead crafts have been around for generations, yet they continue to capture the attention of kids and adults alike. They combine creativity, fine motor skill practice, and a sense of accomplishment into one simple activity.
Unlike many craft trends that come and go, pony bead animals remain popular because they’re inexpensive, easy to learn, and endlessly customizable.
A turtle pony bead keychain is a perfect example of why these classic crafts continue to be loved year after year.
A Great Craft for Beginners
If you’re new to pony bead crafts, this project is an excellent place to start. The pattern is easy to follow, and the finished turtle comes together surprisingly quickly.
Kids love watching the turtle take shape bead by bead, while adults often find the repetitive process relaxing and satisfying. It’s one of those rare crafts that appeals to almost every age group.
Because the design is relatively small, it also makes a great introduction to bead weaving techniques without feeling overwhelming.
Creative Ways to Customize Your Turtle
Before you begin, gather your supplies and choose your favorite colors. Traditional green turtles are always cute, but don’t be afraid to think outside the box.
Some fun color combinations include:
- Bright rainbow turtles
- Ocean-inspired blues and teals
- Pastel spring turtles
- Neon turtles
- School spirit color turtles
- Holiday-themed turtles
The color choices are endless, making every turtle unique.
Supplies You’ll Need
- Pony Beads
- Pony Bead Lacing (Here’s an explanation of why pony bead lacing is the best for making bead buddies.)
- Scissors
- Measuring Device
- Key ring or lobster clasp

Step-by-Step Turtle Pony Bead Keychain Tutorial
Step 1: Prepare Your lacing
Begin by measuring and cutting 60 inches of pony bead lacing.

Then fold the lacing in half and pull it through the key ring or lobster clasp. This will form a lark’s head knot and create two equal strings of lacing.

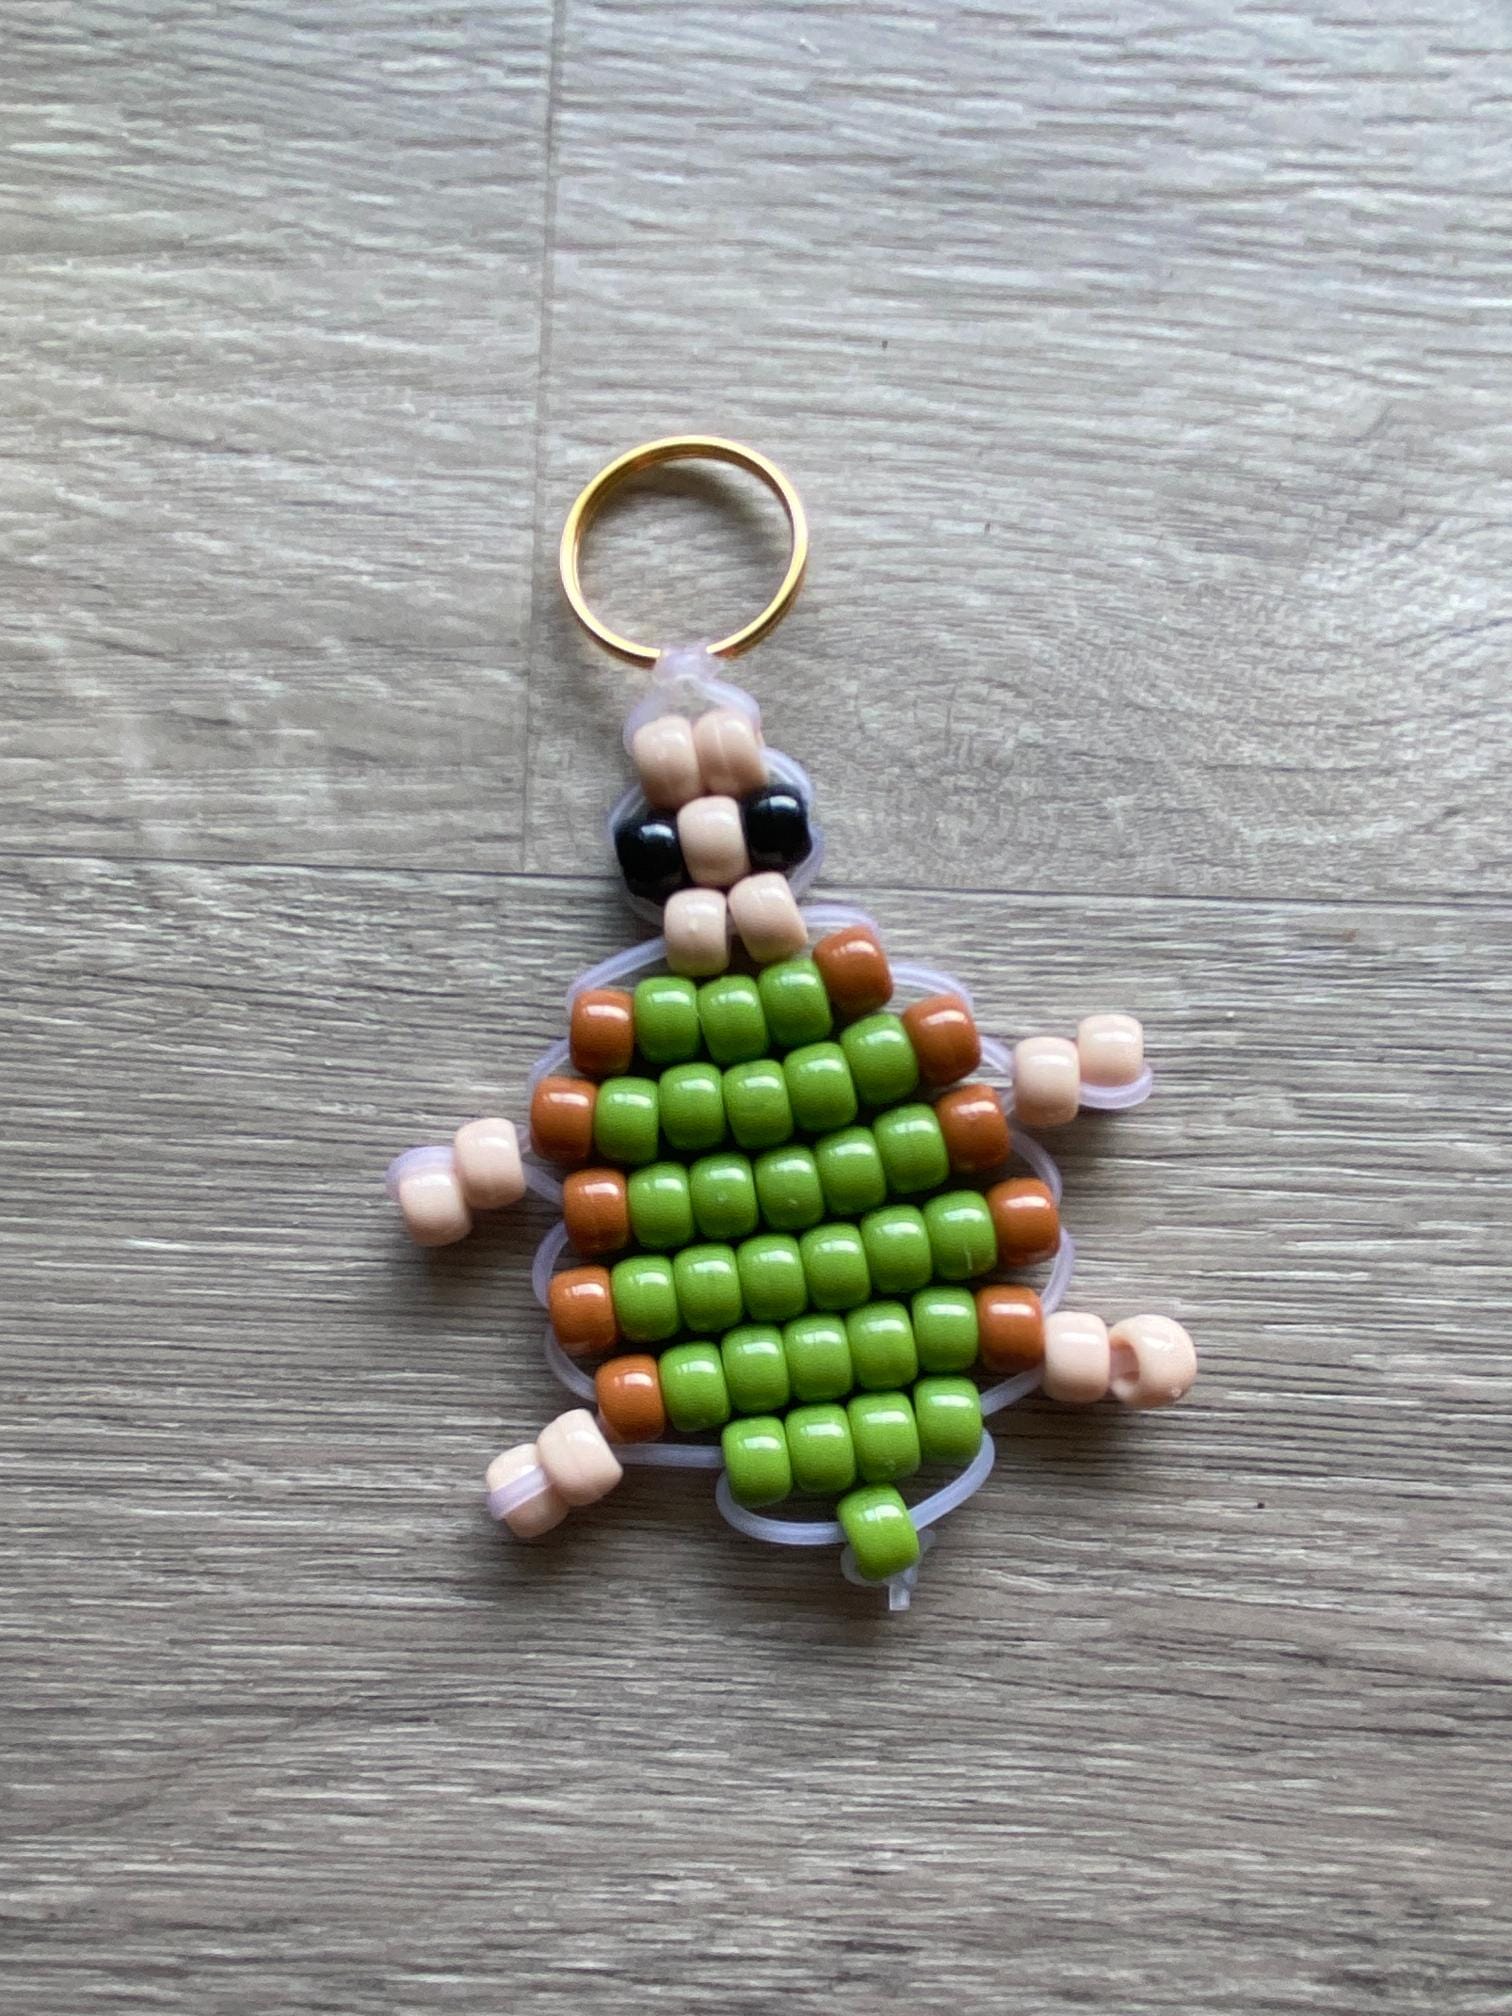
Step 2: Lay Out Your Pattern
Use the photo below to lay out your pattern in pony beads. Feel free to experiment with different colors to make a unique turtle exactly how you want it.

Step 3: String the Beads
To begin stringing the beads, add the top row to the left lacing.

Next, thread the right lacing up through the beads.

Then pull the lacings in opposite directions until taut.

Step 4: Add More Rows
Repeat Step 3 to add the second row of beads.

Moving through your pattern from top to bottom, continue adding rows until you reach the arms.

Step 5: Add the Arms
To add the left arm, string the two arm beads onto the left lacing. Then loop the lacing around the first bead and through the second bead.

Repeat that step to add the right arm.

Step 6: Continue Adding Rows
Now that the arms are in place, continue adding rows by moving through the pattern from top to bottom as before.

Step 7: Add the Feet
Add the feet exactly as you did for the arms in Step 5 above.

Step 8: Final Row and Adjustments
After adding the final row of your pattern, adjust the lacing tension as needed so all the rows lay flat.

Step 9: Tie the Lacing
Tie the lacings together in a knot at the bottom of the last bead.

Step 10: Trim Lacing
For the final step, trim any excess lacing using craft scissors. You made a turtle pony bead keychain!
More Pony Bead Projects to Try
Once you’ve mastered this turtle design, you may want to expand your collection with other pony bead animals and characters. Creating different designs is a great way to practice new techniques while building a collection of handmade keychains and backpack charms.