
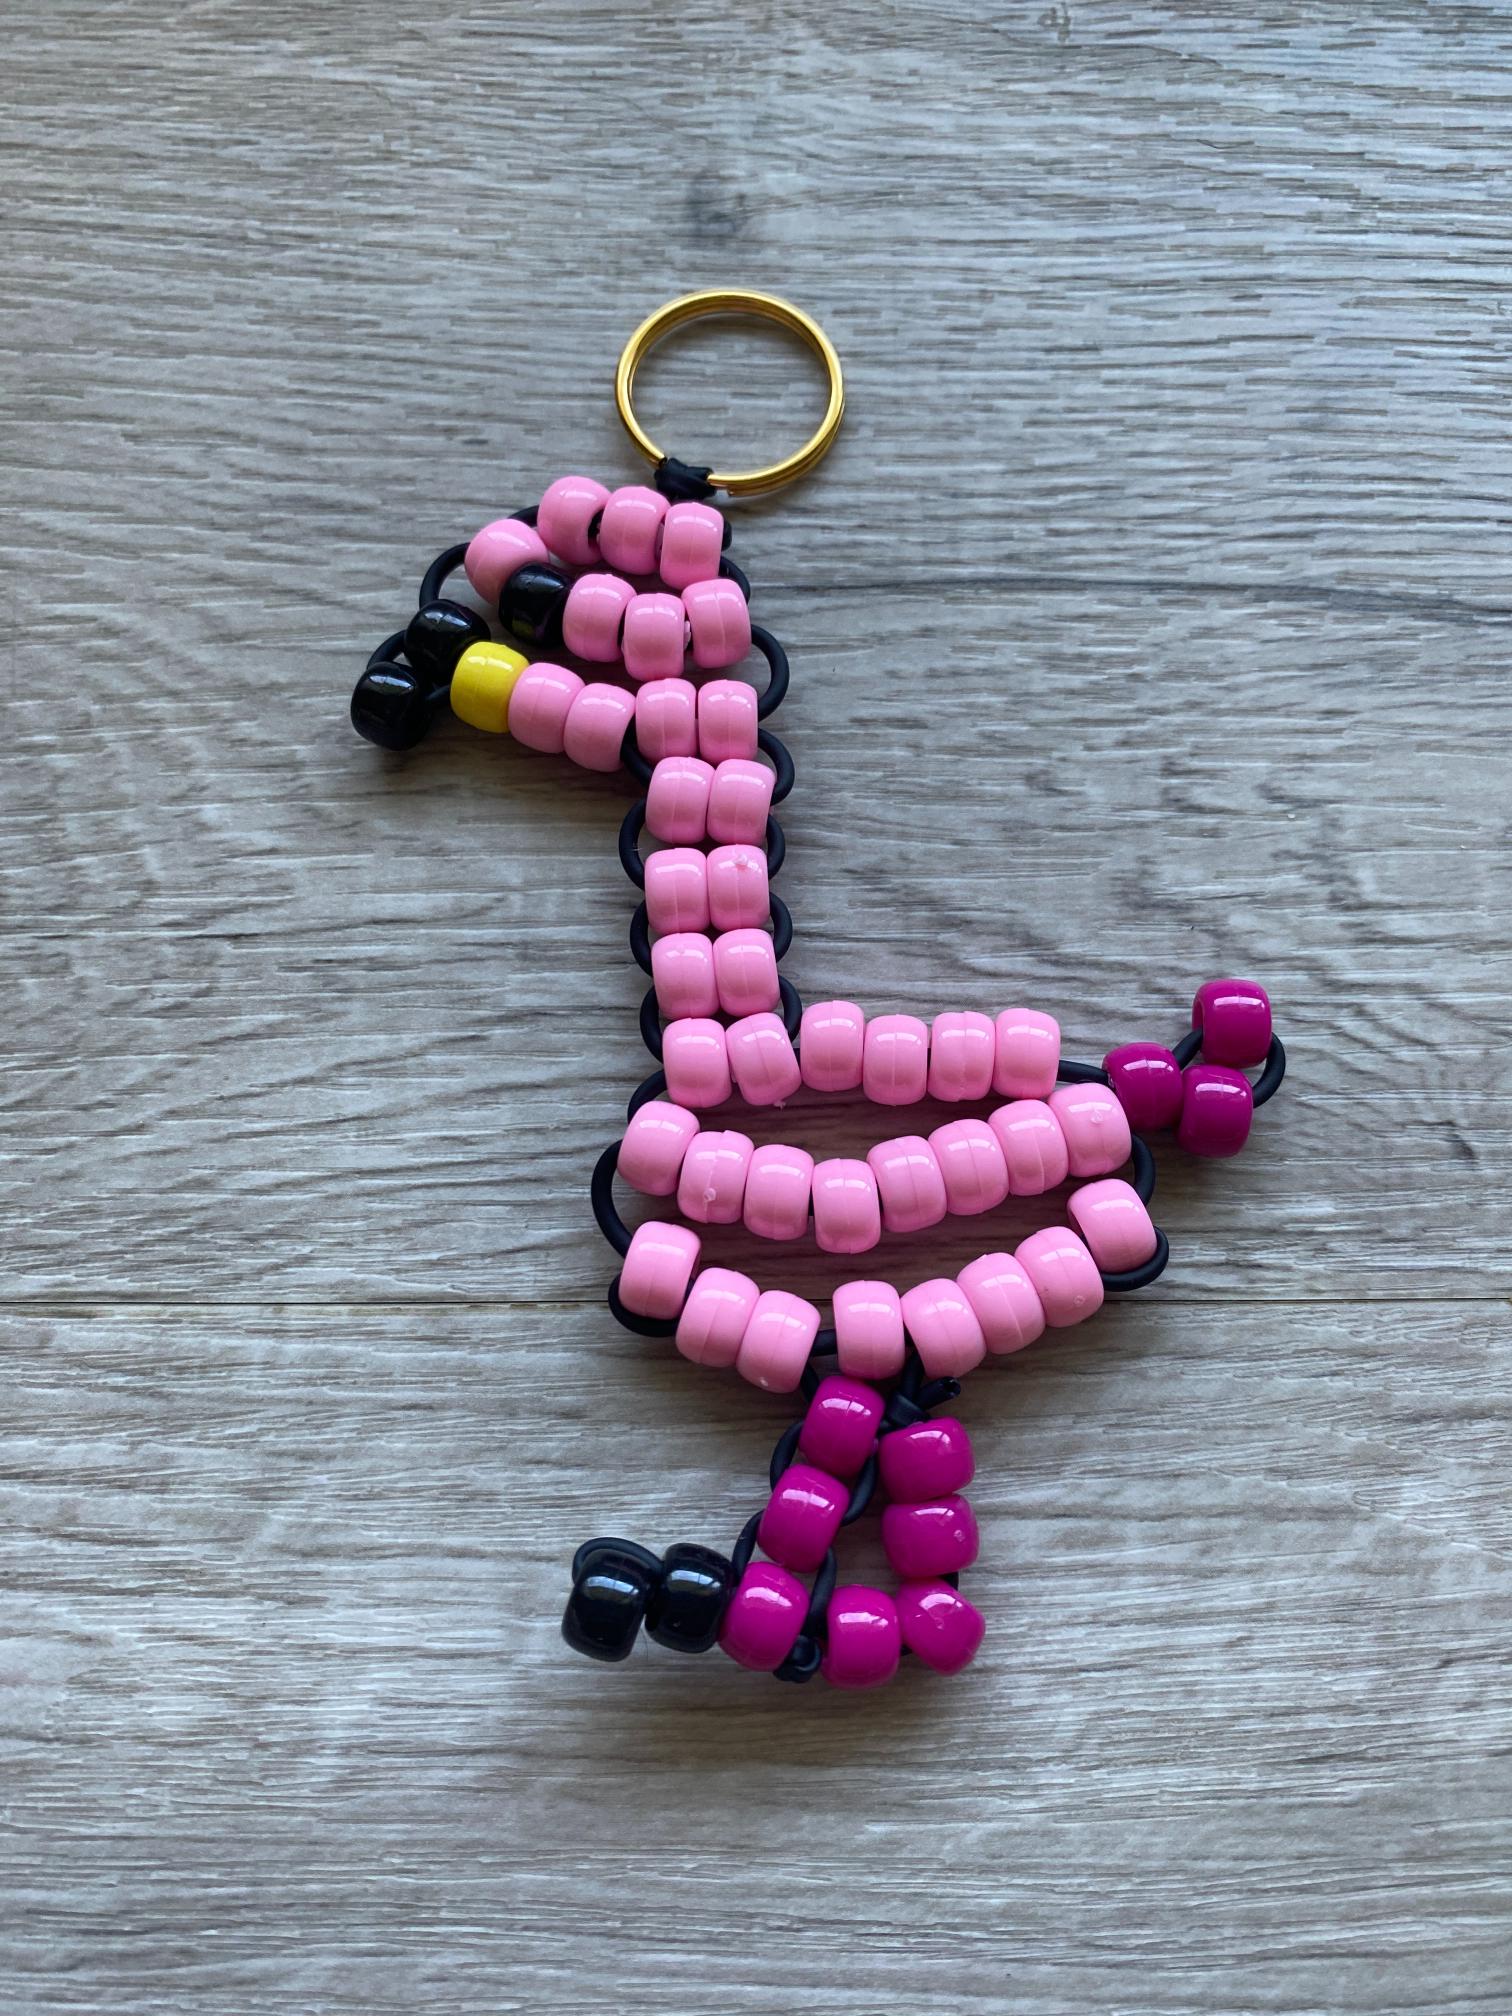
Few things are as instantly iconic as a flamingo, and this hot pink pony bead flamingo bag charm is no exception. With its signature long neck and single standing leg, this little charmer is guaranteed to turn heads wherever it hangs. Follow along step by step and you’ll have your very own beaded flamingo ready to clip onto your bag, backpack, or keyring!

Flamingos are one of those designs that look impressive but are totally achievable, even if you’re new to pony beading. The long neck and leg are what make this charm so recognizable, and once you see it come together row by row, you’ll be absolutely hooked.
Why You’ll Love This Project
This project is a step up from basic shapes but still very beginner friendly. The long neck and leg are worked separately, which sounds tricky but is actually a really satisfying part of the process. If you’ve already made the pony bead cat bag charm or the pony bead dog bag charm, you already know everything you need to tackle this one.
This charm also makes a wonderful gift especially for anyone who loves tropical vibes, summer aesthetics, or just really, really loves pink.
Supplies You’ll Need

Before you get started on your pony bead flamingo bag charm, gather the following:
- Pony beads
- Pony Bead Lacing
- Scissors
- Ruler
- Keyring or lobster clasp (optional, for attaching to a bag or keychain)
Hot pink is the classic flamingo color, but don’t let that stop you from experimenting! Try coral for a sunset flamingo, pale pink for a softer look, or even lavender for a totally whimsical twist.
Step 1: Prepare Your Lacing

Cut approximately 60″ of pony bead lacing. Flamingos have a long neck and leg, so having plenty of lacing to work with is especially important for this design. Trim the excess at the end rather than running short mid-project.

Fold your lacing in half to find the center point and loop it through your keyring before you begin beading. This keeps everything anchored as you work.
Step 2: Lay Out Your Pattern
Before you string a single bead, lay out your full flamingo pattern using the photo guide below. Having everything organized in front of you before you start is especially helpful here.

Use black beads for the eye and beak tip, and pinks for the entire body, neck, and leg.
Step 3: Build the Head and Beak

Start at the top of your pattern with the head. String the first row of beads onto the left lacing.

Then thread the right lacing through in the opposite direction and pull gently until the row sits flat and snug.

Repeat those steps to add the next two rows.

Step 4: Add the Beak
To add the beak, string the single bead onto the left lacing.

Then thread the left lacing through beads 2, 3 and 4 in the third row.

Step 5: Work the Neck
Next string the two remaining beads in that row onto the left lacing.

Thread the right lacing up through the two beads and pull in opposite directions until taut.

Continue adding rows to work your way down the neck slowly and steadily. The longer the neck, the more important consistent tension becomes. Uneven pulls here will cause the neck to twist.
Step 6: Build the Body

String the first row of beads for the body onto the right lacing. Then string the following row onto the left lacing.

Go ahead and add the three tail beads to the right lacing too.

Loop the right lacing around and back through the first tail bead.

Then thread the right lacing up through all the beads on the left lacing and pull in opposite directions until taut.

Now you can add the next row of the body the way you would add a standard row. String the beads onto the left lacing, and thread the right lacing up through all the beads. Then pull.
Step 7: Add the Legs
In preparation for adding the legs, thread each lacing back through the same row (three beads on the left and four on the right).

Thread all of your leg beads onto one lacing end, working downward from the base of the body. The leg is a single column of beads, so it’s worked on one lacing rather than the cross-through method used for the body.
Add single beads in the same way you added rows. Then string the two feet beads onto the left lacing.

Loop the left lacing around and back through one foot bead and the bottom leg bead.

String all remaining beads onto the right lacing.

Step 8: Tie to Secure
Tie the right lacing to the top of the leg, and tie the left lacing to the bottom.

A firm single knot is all you need. Pull snugly but not so tight that the beads bunch or the charm loses its shape.
Step 9: Trim and Finish
Use craft scissors to trim any remaining lacing close to the knots. Give your flamingo a final look over, gently curve the neck into shape one more time if needed, and clip it onto your bag or keyring.

Your pony bead flamingo bag charm is complete, and it’s absolutely fabulous!
Tips for Success
- Be gentle with the neck tension. The narrow neck rows are the trickiest part of this design. Slow and steady wins the race.
- Lay out the full pattern first. With a design this detailed, having your beads organized before you start makes everything smoother.
- Use true hot pink beads. The bolder the pink, the more instantly recognizable your flamingo will be.
- Let the legs hang freely. Once clipped to your bag, the single leg gives a wonderful sense of motion as it sways. It’s one of the most charming things about this design!

Variations to Try
Once you’ve made your first flamingo, here are some fun ways to remix the design:
- Sunset Flamingo: Use coral and peach beads for a warm, tropical colorway.
- Baby Pink Flamingo: Soft pale pink beads for a delicate, pastel version.
- Glitter Flamingo: Swap in sparkle or iridescent pink beads for a dazzling finish.
- Halloween Flamingo: Use black and orange beads for a spooky seasonal twist nobody will see coming.
- Rainbow Flamingo: Use a different bright color for each section. Make it totally wild and totally wonderful.
More Pony Bead Crafts
Loved this tutorial? Here are a few more to add to your collection: