
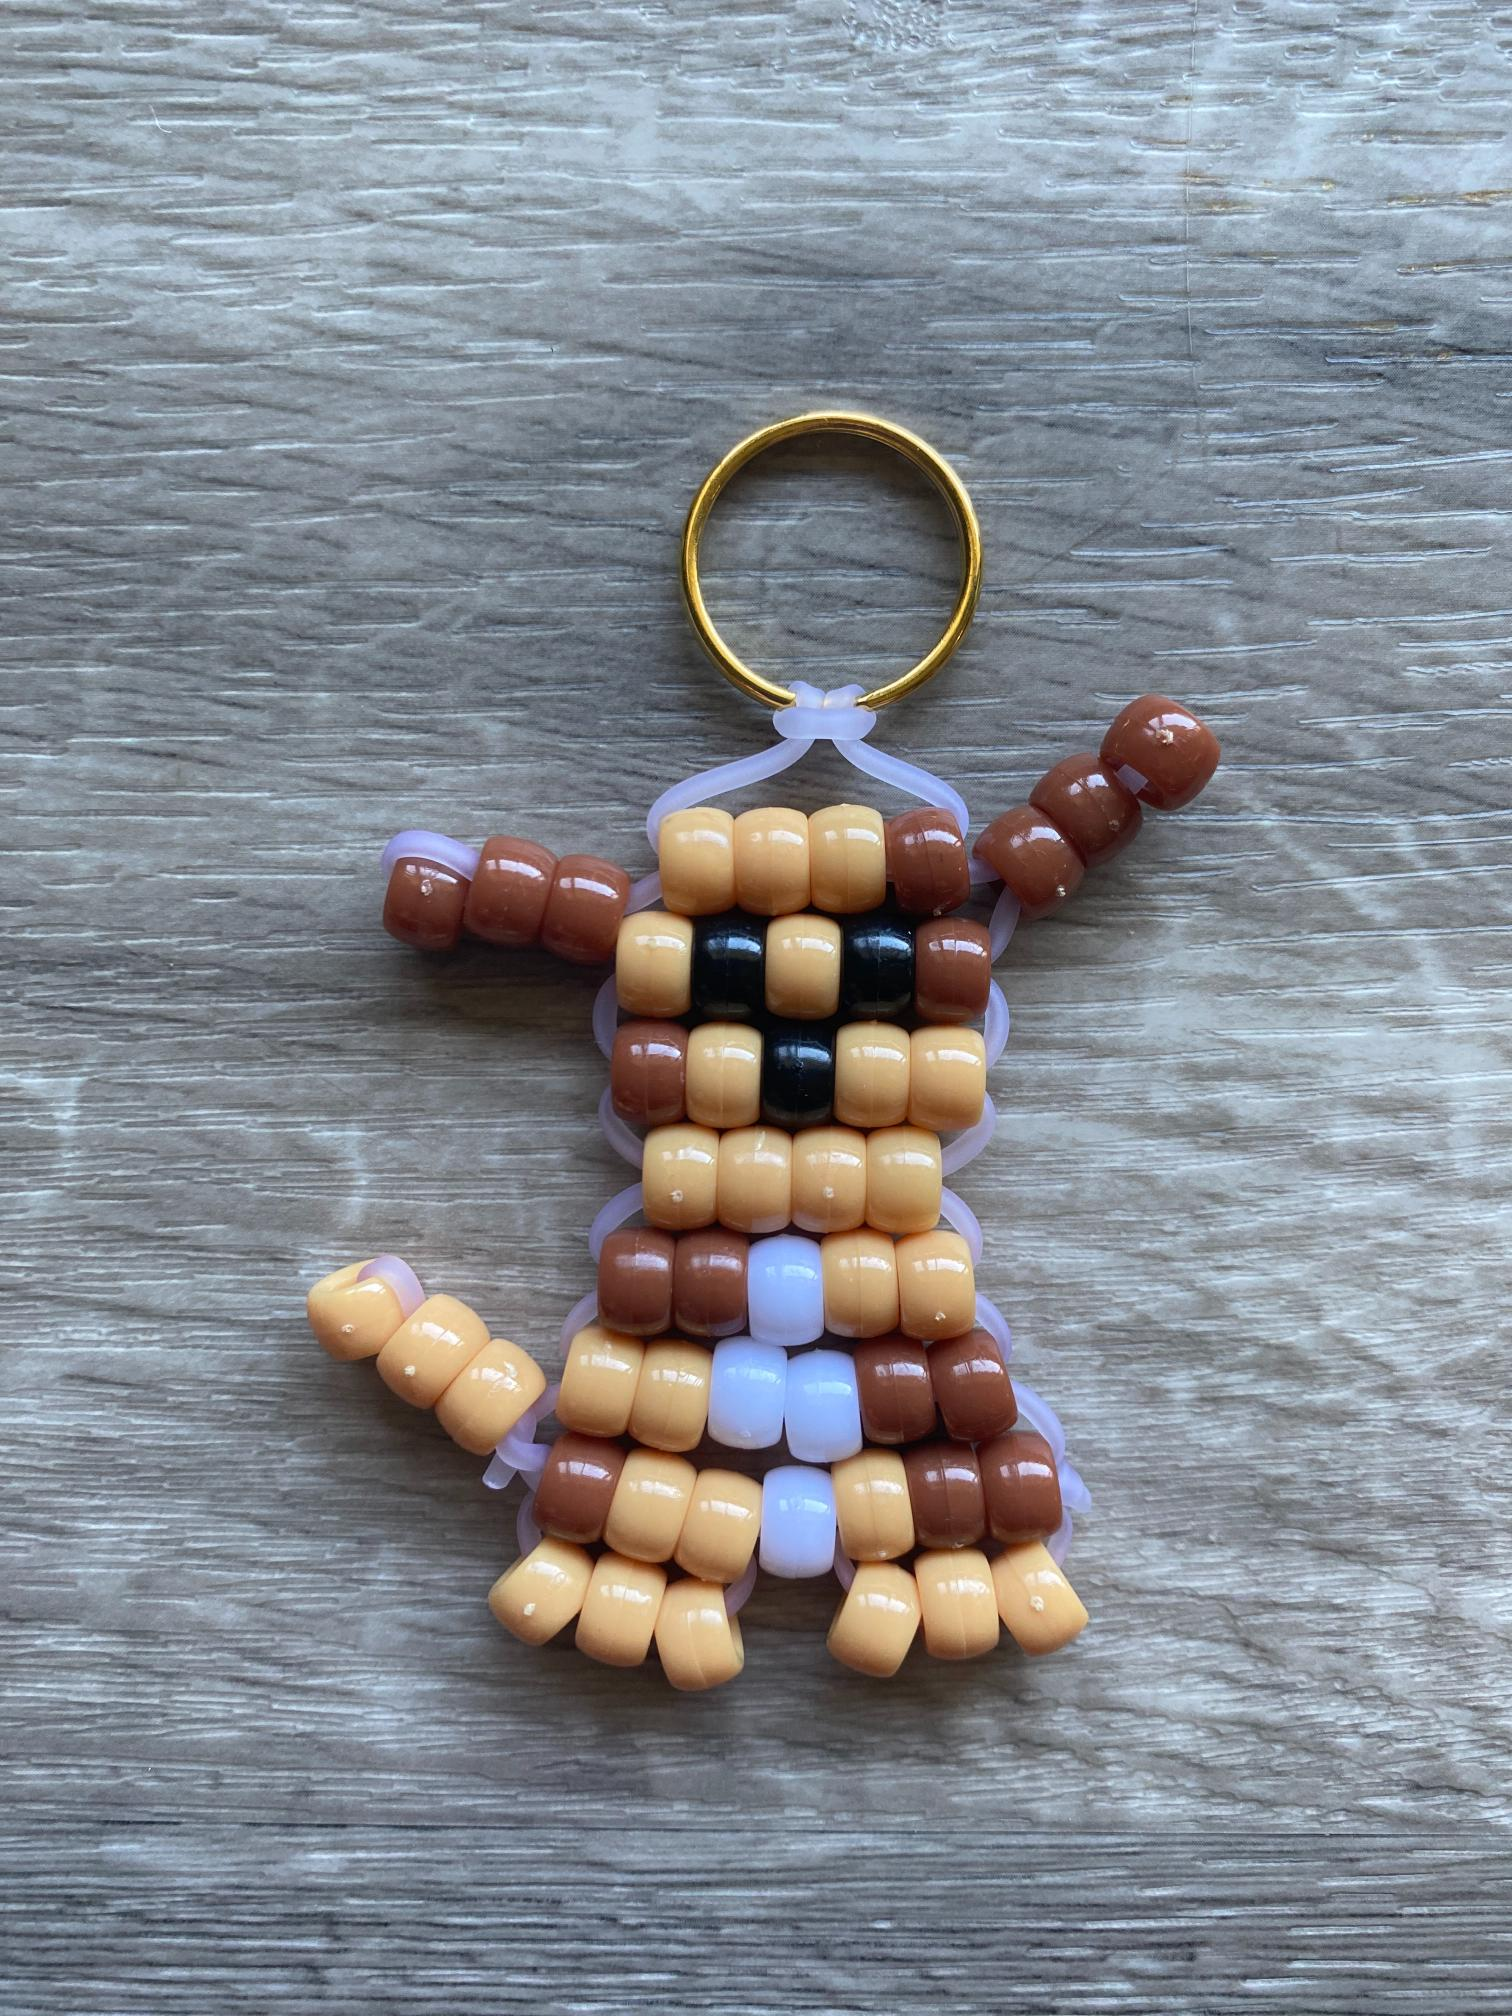
If you’re a dog lover who also loves crafting, this pony bead dog bag charm was made for you. This adorable brown and white pup, complete with floppy ears and a wagging tail, is the perfect project to hang on your backpack, tote bag, or keyring. Follow along step by step and you’ll have your very own beaded dog charm in no time!
Dogs are one of the most beloved animals on the planet, and this little pony bead pup captures all that charm in a tiny, hangable form. The floppy ears and tail are what really bring this design to life and make it look like a real dog rather than just a basic shape.
Why You’ll Love This Project
This project is beginner friendly but has just enough detail to make it feel like a real accomplishment when you’re done. If you’ve already tried the pony bead cat bag charm or the axolotl bag charm, you’ll find the technique here very familiar. And if this is your first pony bead animal – welcome! You’re going to love it.
This also makes a wonderful handmade gift for any dog mom, dog dad, or kid who is obsessed with their furry best friend.
Supplies You’ll Need

Before you get started on your pony bead dog bag charm, gather the following:
- Pony beads in brown, white, and black
- Pony Bead Lacing
- Scissors
- Ruler
- Keyring or lobster clasp (optional, for attaching to a bag or keychain)
Brown and white is a classic dog color combo, but feel free to make it look like your own pup! Try golden and white for a retriever, black and white for a border collie, or all black for a lab.
Step 1: Prepare Your Lacing

Cut approximately 110cm of pony bead lacing. Having extra is always better than running short. You can trim the remainder once your charm is complete.

Find the center of your lacing, fold it in half, and loop it through your keyring before you begin. This anchors everything in place as you work.
Step 2: Lay Out Your Pattern
Before stringing a single bead, take a moment to lay out your full dog pattern using the photo guide below. Dogs have a few more details than basic shapes, the floppy ears and tail in particular, so having everything organized before you start will save you a lot of time.

Use black beads for the eyes and nose, brown for the main body and ears, and white for the muzzle and belly details.
Step 3: Build the Head

Start at the top of your pattern with the head rows. String the first row of beads onto the left lacing, then thread the right lacing through those same beads in the opposite direction.

Pull both ends gently until the row is snug and flat.

Step 4: Add the Floppy Ears
This is the step that gives your dog its personality!

To make the left ear, thread your brown ear beads onto the left lacing. Then bring the left lacing around and back through two beads, skipping the first.

Pull taut.

Repeat the same process on the right side for the right ear.

Pull gently to adjust — floppy ears should droop down naturally on either side of the head.
Step 5: Continue Adding Rows

Moving from top to bottom, string the next row of beads onto the left lacing.

Thread the right lacing up through the beads and pull both lacings in opposite directions.
Keep your tension even throughout. Consistent pulls make for a flat, neat charm that lays beautifully when it hangs.

Continue adding rows until you get to the bottom.
Step 6: Add the Feet
Once you reach the bottom of the body, it’s time to add the feet and tail. String three beads for the left foot onto the left lacing.

Loop the left lacing around and thread it back through the three beads of the row above.

Repeat to add the right foot.

Step 7: Add the Tail
Next string the tail beads onto the left lacing.

Loop the lacing around and back through two beads, skipping one.

Step 8: Tie to Secure

Loop each lacing through the nearest row, and tie a single knot. Pull the knots snug without over-tightening. You want them secure but not so tight that the beads bunch or the charm loses its shape.
Step 9: Trim and Finish
Use craft scissors to snip any remaining lacing close to the knots. Give your charm a final once-over, adjust any rows that need straightening, and clip it onto your bag or keyring.

Your pony bead dog bag charm is complete, and it’s absolutely adorable! 🐶
Tips for Success
- Even out the ears before moving on. It’s much easier to adjust them while you’re still working than after the body is finished.
- Lay out the full pattern first. Dogs have more details than simpler designs, so this step is especially important here.
- Don’t rush the tension. Even, gentle pulls throughout keep everything flat and neat.
- Personalize the colors. The best version of this charm looks like YOUR dog. Don’t be afraid to customize!

Variations to Try
The dog charm is one of the most versatile designs in the pony bead world because there are so many breeds to recreate:
- Golden Retriever: Use golden and cream beads for an instantly recognizable fluffy friend.
- Dalmatian: White beads with black accent beads scattered through the body for those iconic spots.
- Border Collie: Black and white with extra white on the muzzle and chest.
- Black Lab: All black body with a brown muzzle.
- Dachshund: Elongate the body rows and use rich brown beads for the little dog with the big personality.
No matter which breed you make, the technique stays exactly the same. Just swap the colors!
More Pony Bead Crafts
If you enjoyed this tutorial, here are a few more to try next: