
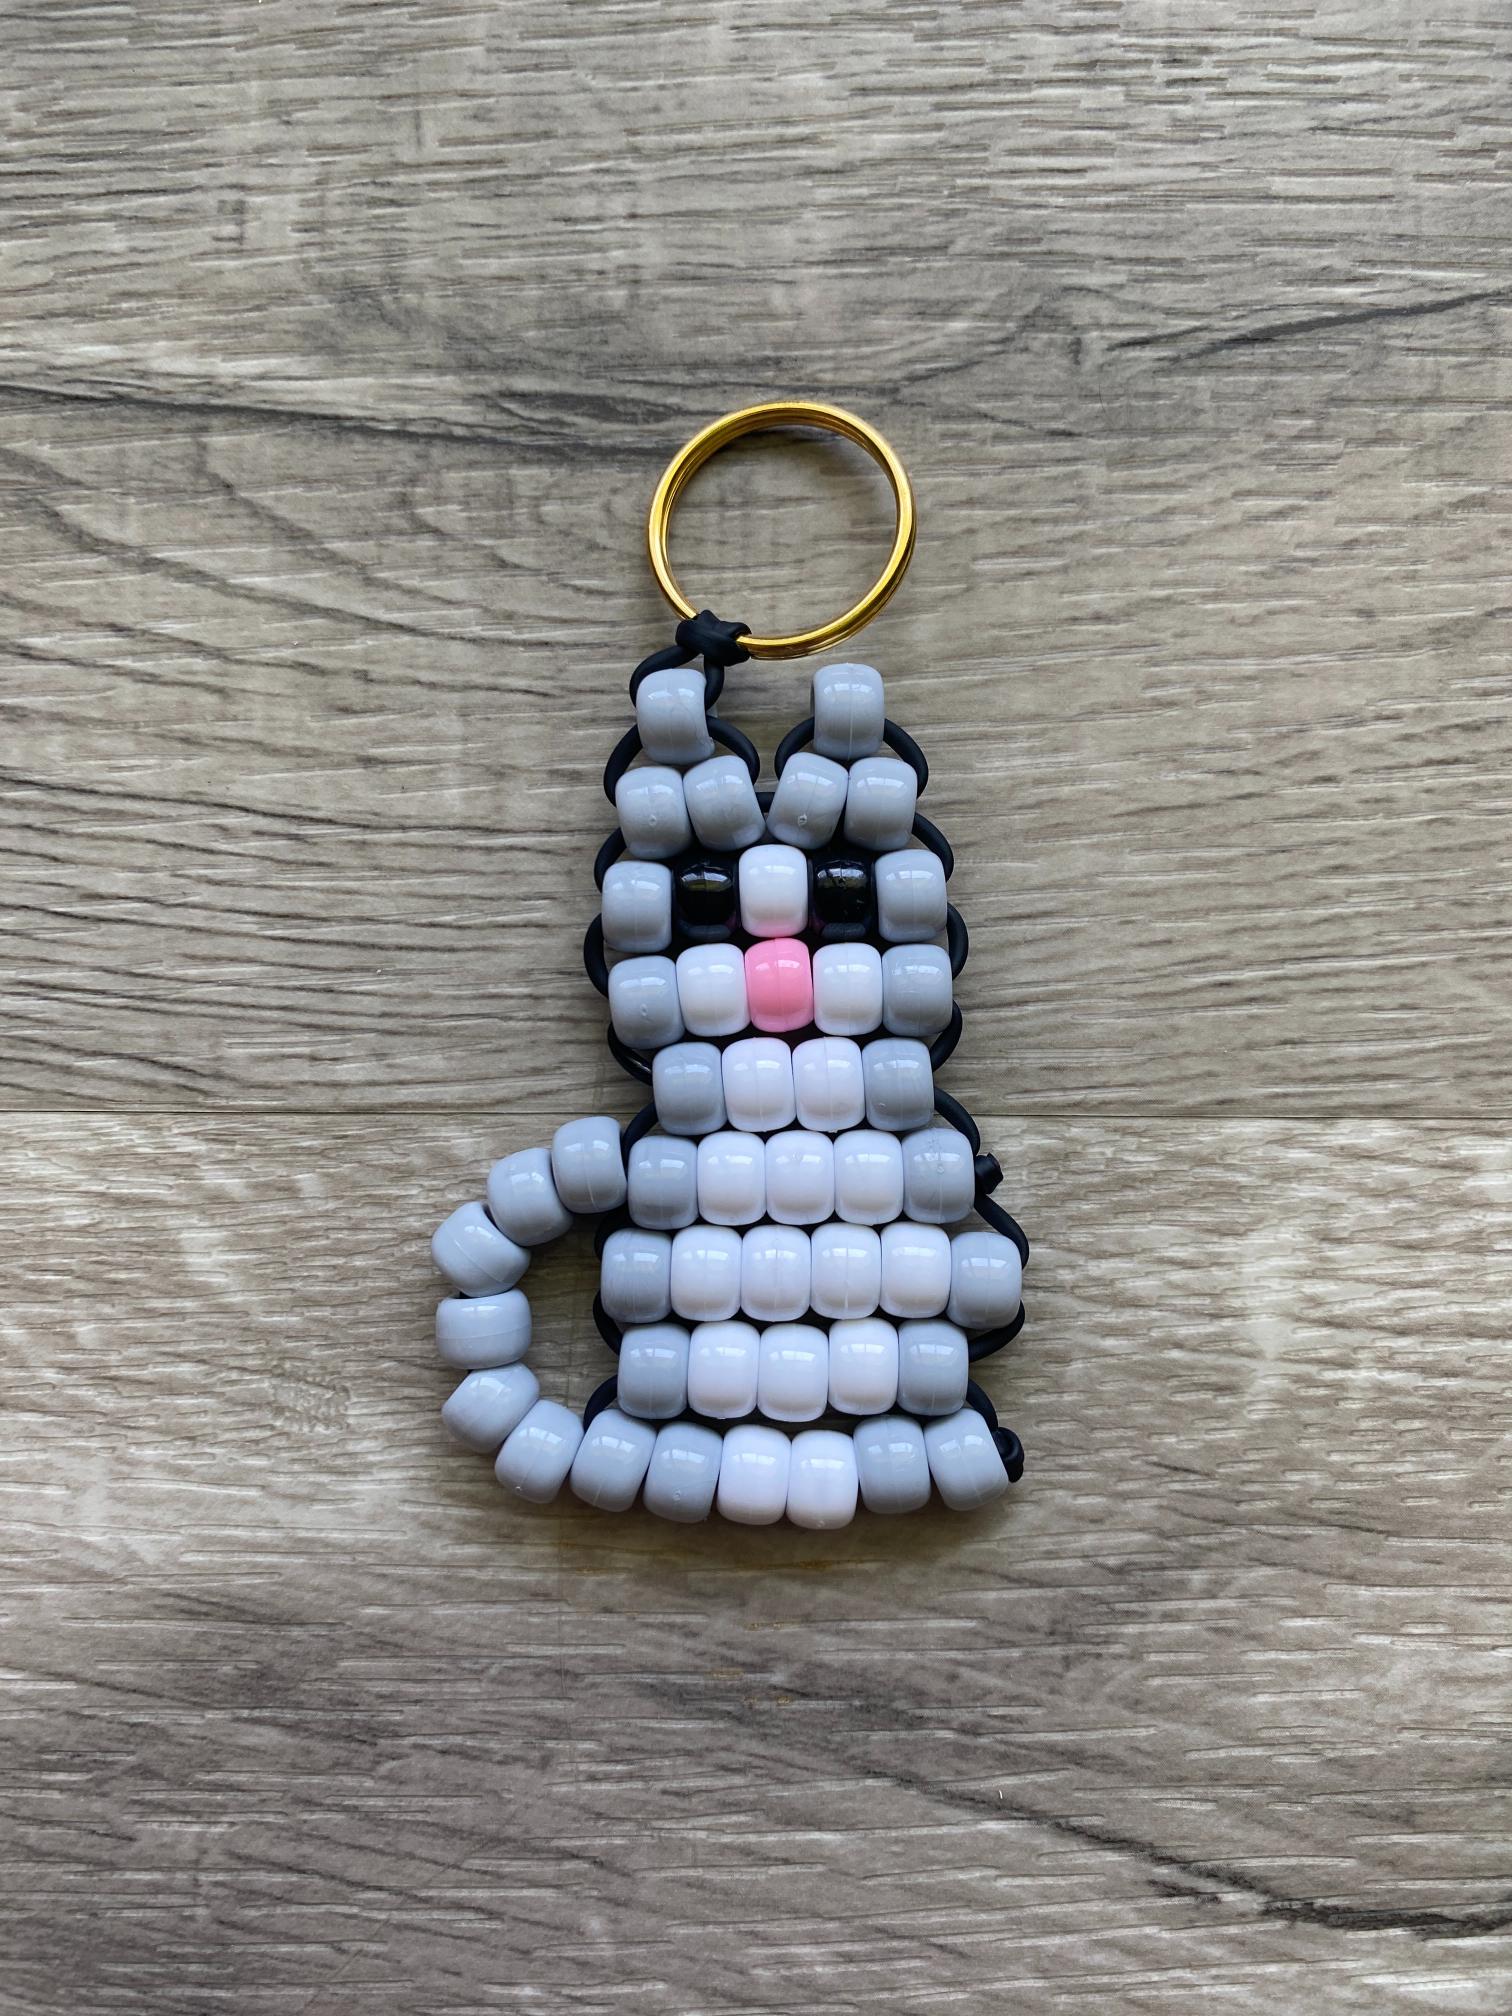
Whether you’re a cat lover looking for your next fun craft project or a pony bead enthusiast ready to add a new animal to your collection, this pony bead cat bag charm is the perfect project for you. In this tutorial, we’ll walk through every step so you can make your own adorable gray and white cat to hang on your bag, backpack, or keyring.
Cats are one of the most popular animals in crafting culture, and for good reason. They’re instantly recognizable, endlessly customizable, and just plain cute. This design translates beautifully into pony bead form, and the added tail gives it extra personality that makes it stand out from basic bag charms.
Why You’ll Love This Project
Pony bead animals are satisfying to make because you can watch your creation take shape row by row. The cat is a great project whether you’re a beginner or you’ve already made designs like the axolotl bag charm or lizard keychain.
The technique is the same, but the tail adds a fun extra step that makes the finished charm extra special. Kids and adults both love this one, and it makes a wonderful gift for any cat lover in your life.
Supplies You’ll Need

Before you get started on your pony bead cat bag charm, gather the following:
- Pony beads in gray, white, and black
- Pony Bead Lacing
- Scissors
- Ruler
- Keyring or lobster clasp (optional, for attaching to a bag or keychain)
Gray and white are classic cat colors, but feel free to swap in orange for a tabby, black for a Halloween cat, or any color combo that feels like your own fur baby!
Step 1: Prepare Your Lacing

Cut approximately 48″ of pony bead lacing. It’s always better to start with more than you think you need. You can always trim the excess at the end.

Fold the lacing in half to find the center point, then loop it through your keyring to secure it before you begin beading.
Step 2: Lay Out Your Pattern
Before stringing any beads, lay out your cat pattern using the photo guide below. This makes it much easier to follow the design row by row without losing your place.

Use black beads for the eyes, pink for the nose, gray for the main body, and white for the belly and face details.
Step 3: String the Left Ear

String the top bead for your left ear onto the left lacing. Then thread the right lacing up through those same beads in the opposite direction and pull both ends gently until the row sits snug.

Avoid pulling too tightly. This can cause your rows to curl up instead of lying flat.
Repeat those steps to add the next row for the ear.

Step 4: Add the Right Ear
Next thread all three beads of the right ear onto the right lacing.

Loop the right lacing around and thread it through the first two beads.

Once pulled taut, you should have two cat ears.

Step 5: Add Rows
Moving from top to bottom of your pattern string the next row of beads onto the left lacing.

Now thread the right lacing up through the beads and pull to form a complete row.

Step 6: Continue Row by Row
Repeat Step 5 for each row, working your way down through the pattern.

Keep your tension consistent as you go. Even, gentle pulls will keep your charm flat and neat.
Step 7: Add the Tail

To add the tail, string all of your tail beads onto one lacing end.

Then loop the lacing back through the row just below the neck. This creates the curved tail shape that gives your cat its personality.
Step 8: Tie to Secure

Once all your beads are strung, tie each lacing end in a single knot to secure. Pull the knots snug but not so tight that they cause the beads to bunch or roll. A single knot works perfectly with pony bead lacing.
Step 9: Trim the Excess
Use craft scissors to trim any remaining lacing close to the knots. And that’s it. Your pony bead cat bag charm is complete!

Clip it to your backpack, tote bag, keyring, or purse for an instant dose of handmade charm.
Tips for Success
- Use black beads for the facial features. They make the eyes and nose stand out against any body color.
- Lay out the full pattern before you start. Having everything organized first saves time and prevents mistakes.
- Pull lacing evenly. Consistent tension keeps your rows straight and your charm looking polished.
- Work on a flat surface. This helps you keep track of your pattern and prevents beads from rolling away.
- Make it your own. This design works in virtually any color — try it in orange, calico, or even rainbow for a fun twist.

Variations to Try
Once you’ve made your first pony bead cat charm, here are some fun ways to mix it up:
- Black Cat: Use all black beads with green eyes for a spooky Halloween version.
- Orange Tabby: Swap in orange and white for a classic tabby look.
- Calico: Mix orange, black, and white for a multicolor calico cat.
- Siamese: Use tan and dark brown beads for an elegant Siamese colorway.
- Rainbow Cat: Use a different color for each row for a fun, whimsical version that’s totally unique.
Pony bead cats are one of those projects that look adorable no matter what colors you choose. Once you make one, you’ll want to make a whole clowder of them.
More Pony Bead Crafts
If you liked this tutorial, you’ll love these too: