
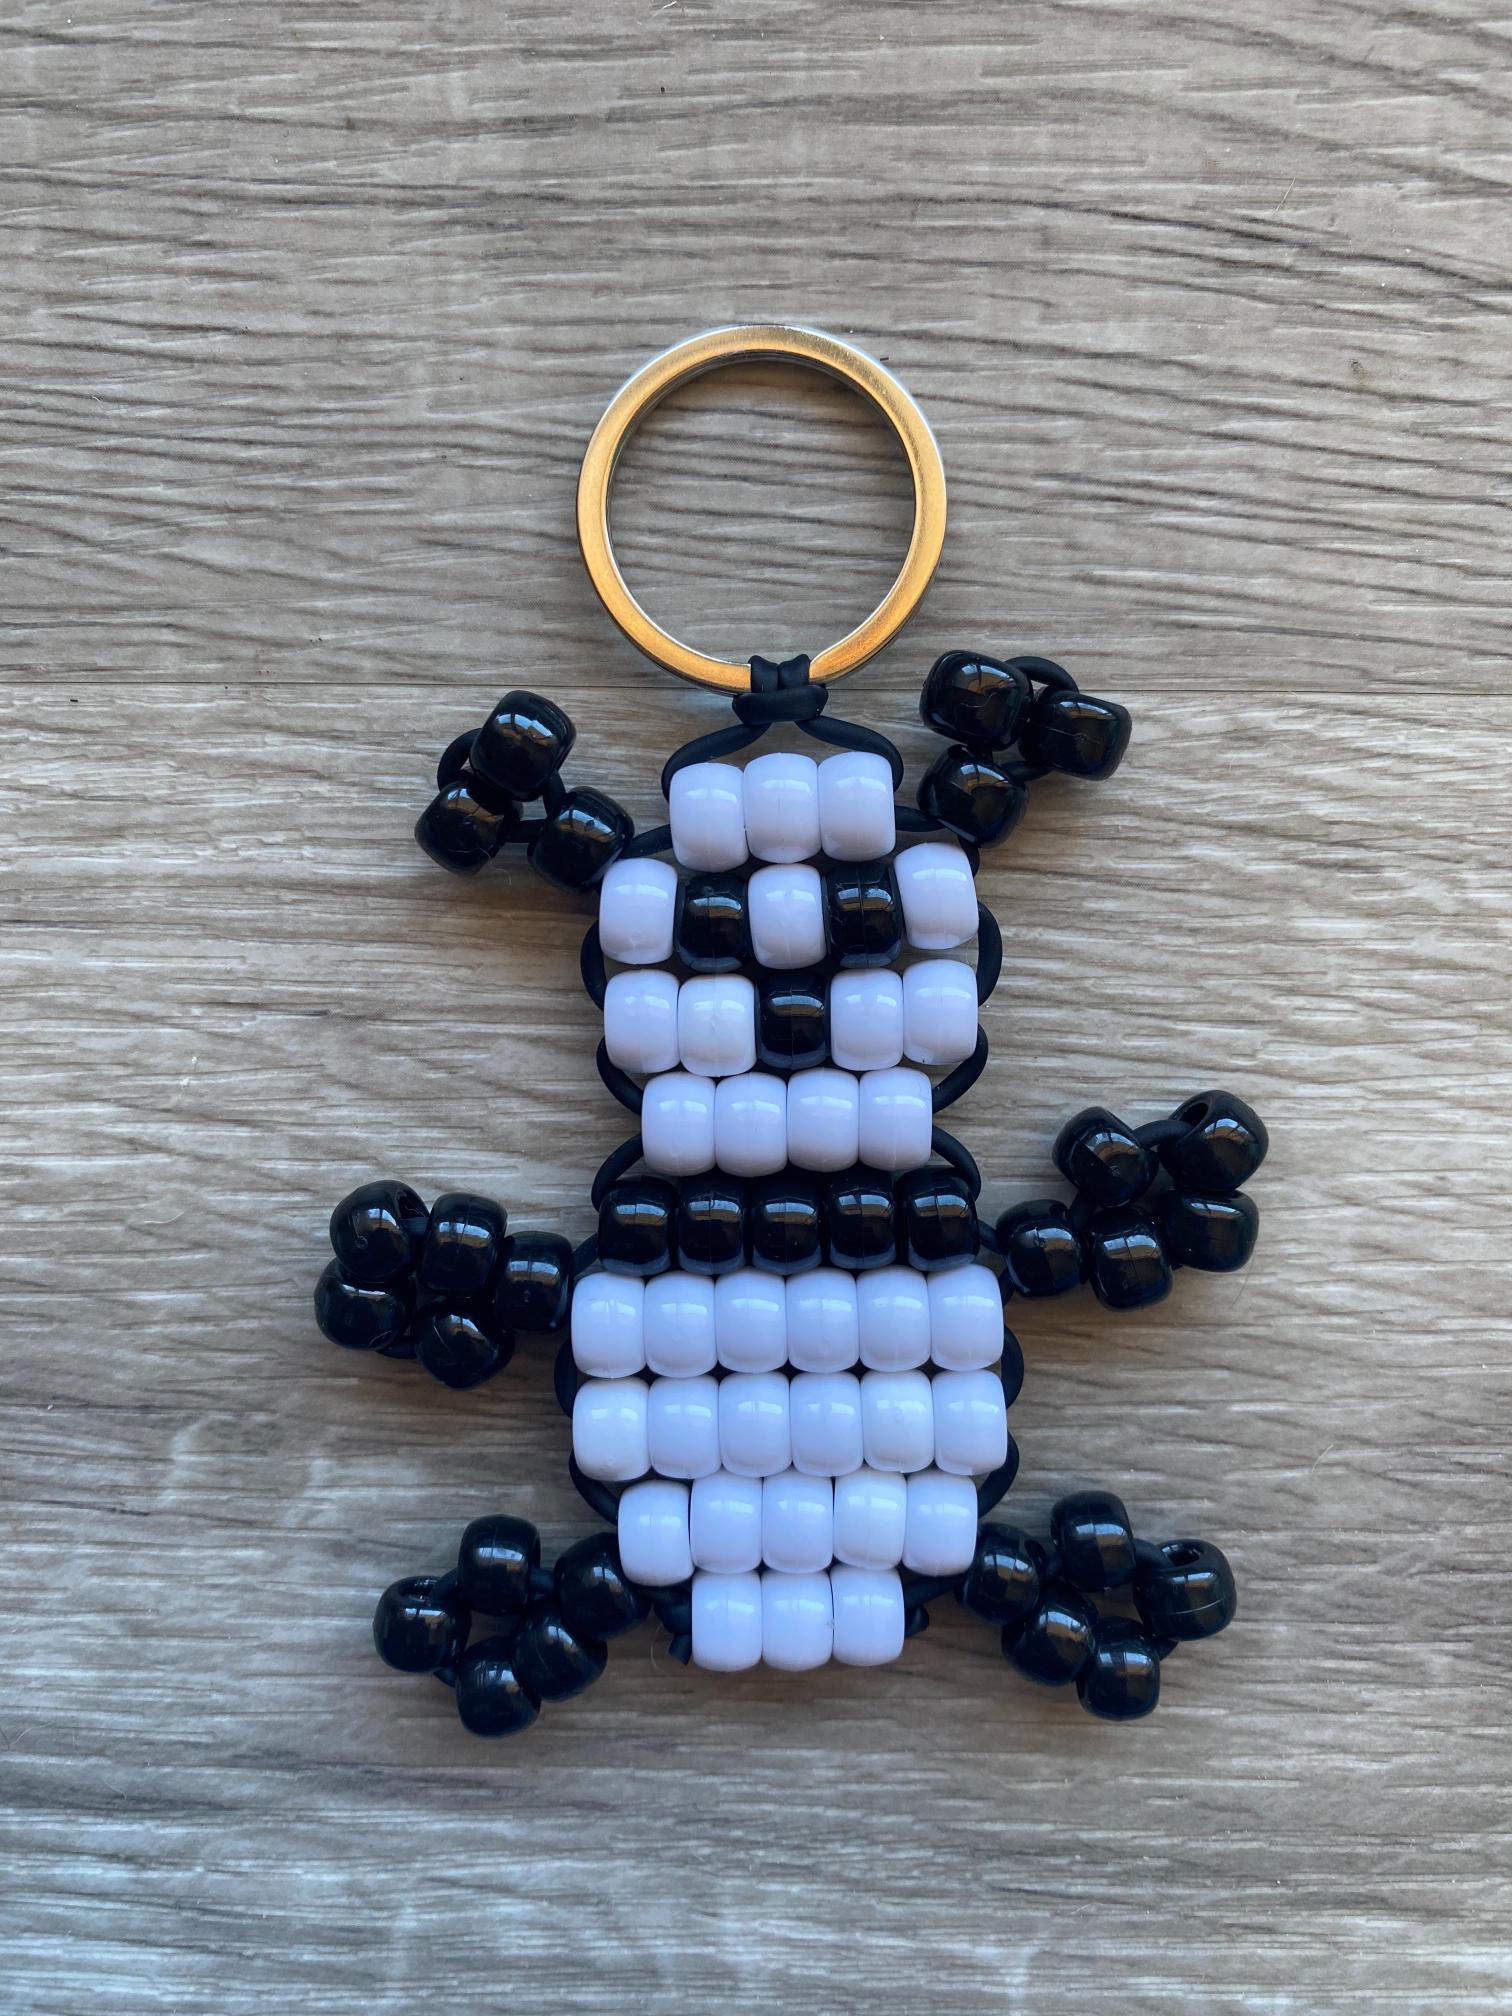
Make an adorable pony bead panda bag charm with this free pattern! A beginner-friendly tutorial perfect for panda lovers, kids, and handmade gift ideas.
Is there any animal more universally adored than a panda? Something about those black and white patches and those sleepy, round eyes gets everyone. The good news is that all of that charm translates perfectly into pony bead form, and this pony bead panda is honestly one of the cutest little bag charms you can make.

The design captures the panda’s most recognizable features: a round face, bold eye patches, and a chubby body that looks like it just finished a very large bamboo snack. It’s beginner-friendly, quick to finish, and makes a wonderful handmade gift for anyone who has panda energy.
Before You Start
Here’s everything you’ll need to make your pony bead panda:
- Pony Beads in black and white (plus pink for the nose)
- Pony Bead Lacing
- Scissors
- Measuring Device
- Key ring or lobster clasp

New to pony bead lacing? Here’s why it makes such a difference compared to regular string or elastic.
Make It Your Own: Color Ideas
Black and white is the obvious choice here, but there’s more room to play than you might think:
Classic Panda – White body, black eye patches, black ears, pink nose. The one and only. You can’t go wrong.
Red Panda Twist – Swap the white for rusty orange or terracotta and the black for dark brown to create a red panda version instead. Totally different vibe, equally adorable.
Pastel Panda – Soft lavender or blush pink body with light gray patches for a dreamy, kawaii-inspired look. Great for Easter baskets or spring gifts.
Glow-in-the-Dark – Use white glow beads for the body so your panda lights up at night. Kids absolutely love this version.
Rainbow Panda – Keep the black patches and swap the white for a rotating rainbow of colors across the body rows. It sounds wild and it is, in the best way.
How to Make a Pony Bead Panda
Step 1: Prepare Your Lacing
Begin by measuring a length of 120 centimeters of pony bead lacing. Cut it to size using craft scissors.

Next, fold the lacing in half and pull it through the key ring or lobster clasp to secure it. This will form two equal lengths of lacing.

Step 2: Lay Out Your Pattern
Use the photo below to lay out your design in pony beads. Be sure to work on a flat surface.

Step 3: String the Beads
Start by stringing the top row of beads onto the left lacing.

Then thread the right lacing up through the beads.

Pull the lacings in opposite directions until taut. This should form a horizontal row of beads just under the key ring or lobster clasp.

Step 4: Add the Ears
To add the left ear, string all three beads onto the left lacing.

Now loop the left lacing around and back through the first ear bead.

Repeat that process on the right lacing to add the right ear.

Step 5: String More Rows
Let’s continue to form the head by stringing the top row of beads onto the left lacing.

Then thread the right lacing up through the beads and pull in opposite directions to create a row.

Follow this step to continue adding rows until you reach the arms.

Step 6: Add the Arms
Next, string all the beads for the left arm onto the left lacing.

Now loop the left lacing around and back through the first arm bead.

Repeat this step on the right lacing to add the right arm.

Step 7: Create the Body
Continuing working from top to bottom to add rows until there is one left.

Step 8: Add the Feet
To add the feet, use the same process you did in Step 6 to add the arms.

Step 9: String the Final Row
Add the last row as you did for all other rows – string beads on the left lacing, and thread the right lacing up through the beads.

Step 10: Secure the Lacing
To secure the lacing, loop each one through the row above it and tie it in a single knot.

Step 11: Trim Excess Lacing
Use craft scissors to trim any excess lacing near the knots.

You made a pony bead panda!
More Pony Bead Animals to Try
Once you’ve made your panda, the whole bead animal kingdom is waiting: