
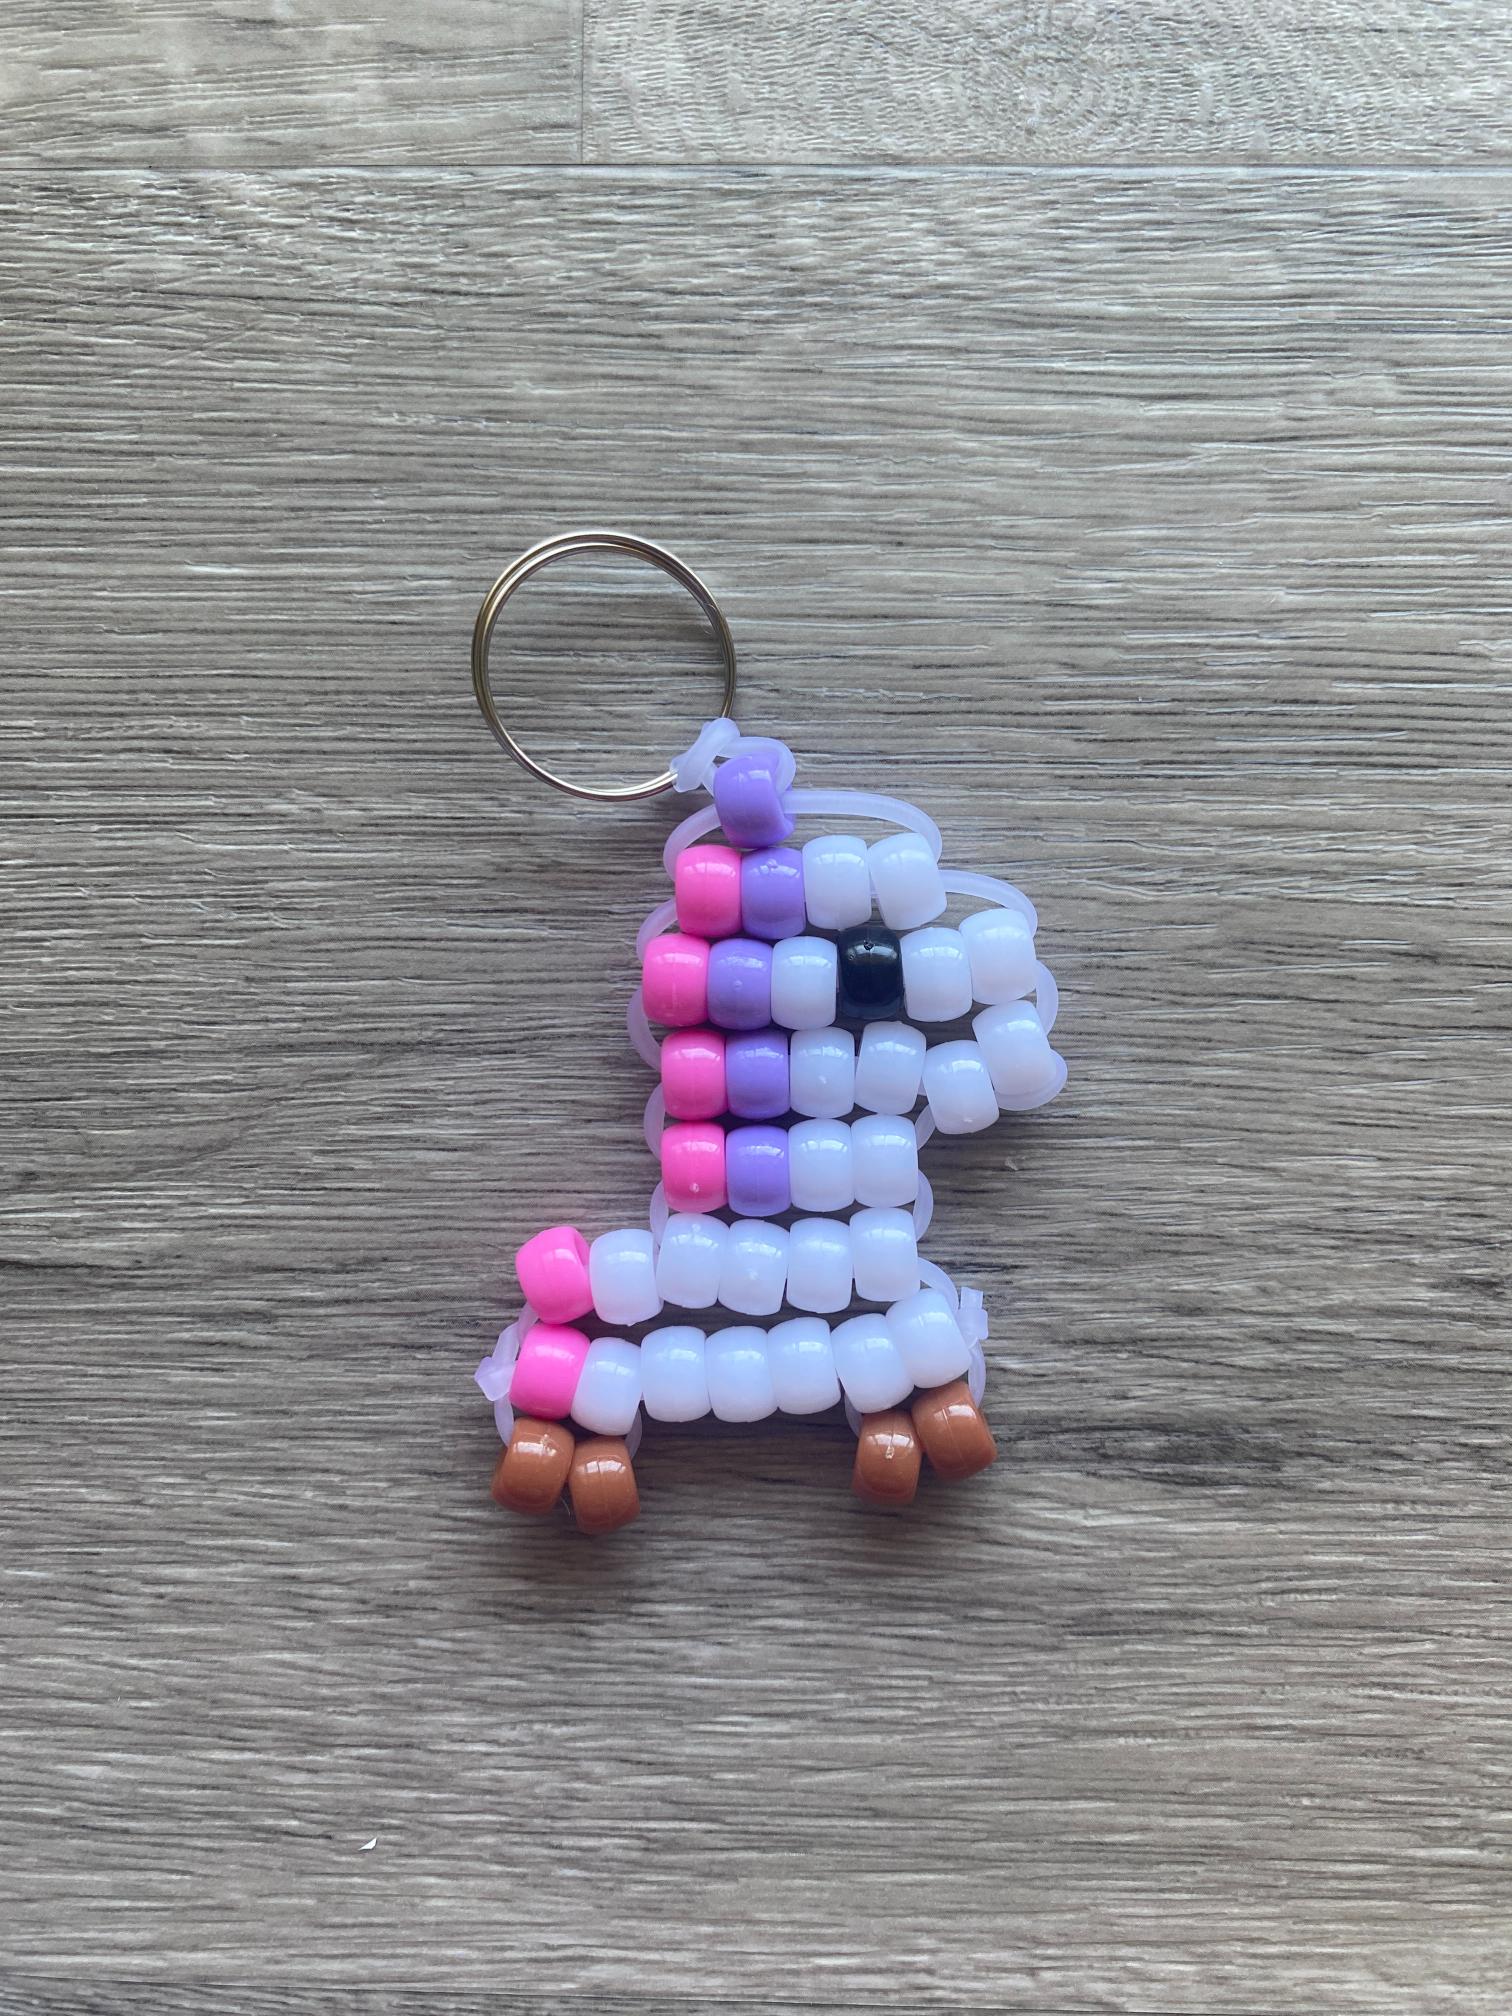
If you’ve ever wondered whether the pony in pony beads could be turned into an actual pony, the answer is yes, and it’s every bit as charming as you’d hope. This little pony bead pony makes a perfect bag charm, keychain, or handmade gift for any horse lover in your life, and it’s beginner-friendly enough to finish in a single sitting.
What Makes This Pattern So Fun
The pony is one of those designs with instant “aww” factor. The mane is where the personality really comes through. Swap colors there and you’ve got a completely different looking charm every time. Brown body, cream mane for a classic horse. All white for a unicorn vibe. Hot pink with a purple mane because why not. The possibilities are genuinely endless, which makes this one of the most repeatable patterns in the bead buddy world.

It’s also a great pattern for kids who are into horses, My Little Pony, or just animals in general. And if you’re the kind of crafter who loves making sets, a whole little herd in different color combinations looks incredible clipped together on a bag.
Color Combos to Try for Your Pony Bead Pony
The pony’s mane and tail are where all the fun happens, so this is your chance to get creative. Whether you’re going for a realistic horse or something straight out of a fantasy storybook, these combos are a great place to start.
| Look | Body | Mane & Tail | Accent |
|---|---|---|---|
| Classic Bay | Brown | Black | White nose |
| Palomino | Golden yellow | Cream or white | Pink nose |
| Gray Dapple | Light gray | White | Black hooves |
| Unicorn | White | Pastel rainbow | Gold or silver horn bead |
| Fantasy Pony | Lavender | Hot pink | Glitter beads |
| Appaloosa | White | Black | Spotted brown accents |
Tips for the Best Results
The mane and tail are the details that really bring this pony bead pony to life, so take your time with those rows and make sure your color placement matches your layout before you start stringing.
If you want to add extra personality, use a contrasting color for just the nose row. A single pink or cream row makes the face pop noticeably.
Making a set? Pick one consistent body color and swap out just the mane and tail color for each one. It ties the herd together while still making each charm feel unique.
Supplies You’ll Need
- Pony Beads in your chosen body, mane, and accent colors
- Pony Bead Lacing
- Scissors
- Measuring Device
- Key ring or lobster clasp

New to pony bead lacing? Here’s why it’s the best choice for bead buddy projects over regular string or elastic.
How to Make a Pony Bead Pony
Step 1: Prepare Your Lacing
Start by measuring 95 centimeters of pony bead lacing. Cut it to size with craft scissors.

Next, fold the lacing in half and pull it through the key ring or lobster clasp to secure.

Now you should have two equal lengths of lacing, a right and a left.
Step 2: Lay Out Your Pattern
Use the photo below to lay out your pattern in pony beads on a flat surface. This is when you can get creative with colors to create a unique pony just the way you want it.

Step 3: String the Beads
Begin by stringing the top beadof your pattern onto the left lacing.

Then thread the right lacing up through the bead.

Next, pull the lacings in opposite directions until the bead is horizontal just under the knot.

String the next row of beads onto the left lacing.

Thread the right lacing up through all the beads in that row and pull the lacings in opposite directions again.

Repeat that process to add the next row of beads as well.

Step 4: Form the Neck
To create the neck, loop the right lacing around the first bead and back through the second bead.

Now string the next row of beads onto the left lacing.

Thread the right lacing up through the beads and pull in opposite directions to form a row.

Step 5: Create the Body
Next, add the body by stringing a row of beads onto the RIGHT lacing.

Then thread the left lacing up through the top four beads only.

Pull it taut.

Now string the final row of beads onto the left lacing.

Thread the right lacing up through the beads except for the two beads remaining at the top from the previous row.

Once again, pull the lacings in opposite directions.

Step 6: Add the Hooves
String the two beads for the left hoof onto the left lacing.

Loop the left lacing around and back through the two left beads of the row above. In this example, they are white and pink.

Pull the lacing all the way through.

Repeat this step to add the right hoof onto the right lacing.

Step 7: Secure the Lacing
Loop each lacing through the row above and tie them in a single knot to secure.

Step 8: Trim Excess Lacing
Finally, use craft scissors to trim any excess lacing near each knot.

You made a pony bead pony!
More Pony Bead Animals to Make Next
If you loved this tutorial, you’ll love making these pony bead animals too: