If you’re looking for a fun and quick craft project, this llama pony bead keychain is exactly what you need. Whether you’re crafting solo at the kitchen table or looking for a project to keep the kids busy, this one is a winner.
Pony bead keychains are one of my favorite things to make because they’re portable, affordable, and endlessly customizable. The llama design is especially fun because you can go realistic with natural browns and creams, or go totally wild with pastel rainbow colors. The choice is yours!
What Makes This Llama Keychain So Fun
Llamas have been having a major moment in the craft world, and it’s easy to see why. They’re quirky, charming, and just a little bit extra, which makes them perfect for a keychain you’ll actually want to show off. Clip one onto your backpack, your keys, or your lunchbox and watch the compliments roll in.

Color Ideas for Your Llama Pony Bead Keychain
One of the best things about this project is how many ways you can customize it. Here are some fun color combos to try:
Classic Llama – Use cream or tan for the body and a pop of color for the decorative blanket on the back.
Rainbow Llama – Go full maximalist with a multicolor body in pinks, purples, teals, and yellows. Perfect for kandi-style keychains!
Pastel Llama – Soft lavender, baby pink, and mint make for the dreamiest little llama. Great for spring or Easter crafts.
Earth Tone Llama – Brown, tan, and ivory give a more realistic look that’s still totally charming.
Holiday Llama – Swap in red and green for Christmas, or orange and black for Halloween. The llama shape works with just about any color palette!
Don’t be afraid to mix and match. Half the fun of pony bead crafts is playing with color combinations until you find the one that makes you happy.
Supplies You’ll Need
To make your llama pony bead keychain, gather these supplies before you get started:
- Pony Beads
- Pony Bead Lacing (Here’s an explanation of why pony bead lacing is the best for making bead buddies.)
- Scissors
- Measuring Device
- Key ring or lobster clasp

How to Make a Llama Pony Bead Keychain
Step 1: Prepare Your Lacing
Begin my measuring 75 inches of pony bead lacing and using your craft scissors to cut it to size.

Next, fold the lacing in half and pull it through the key ring or lobster clasp to secure. This will create two equal lengths of lacing.

Step 2: Lay Out Your Pattern
It is helpful to lay out your pattern in pony beads on a flat surface. This makes it easy to move through the pattern as you add rows of beads. Plus you can see how the colors look together.
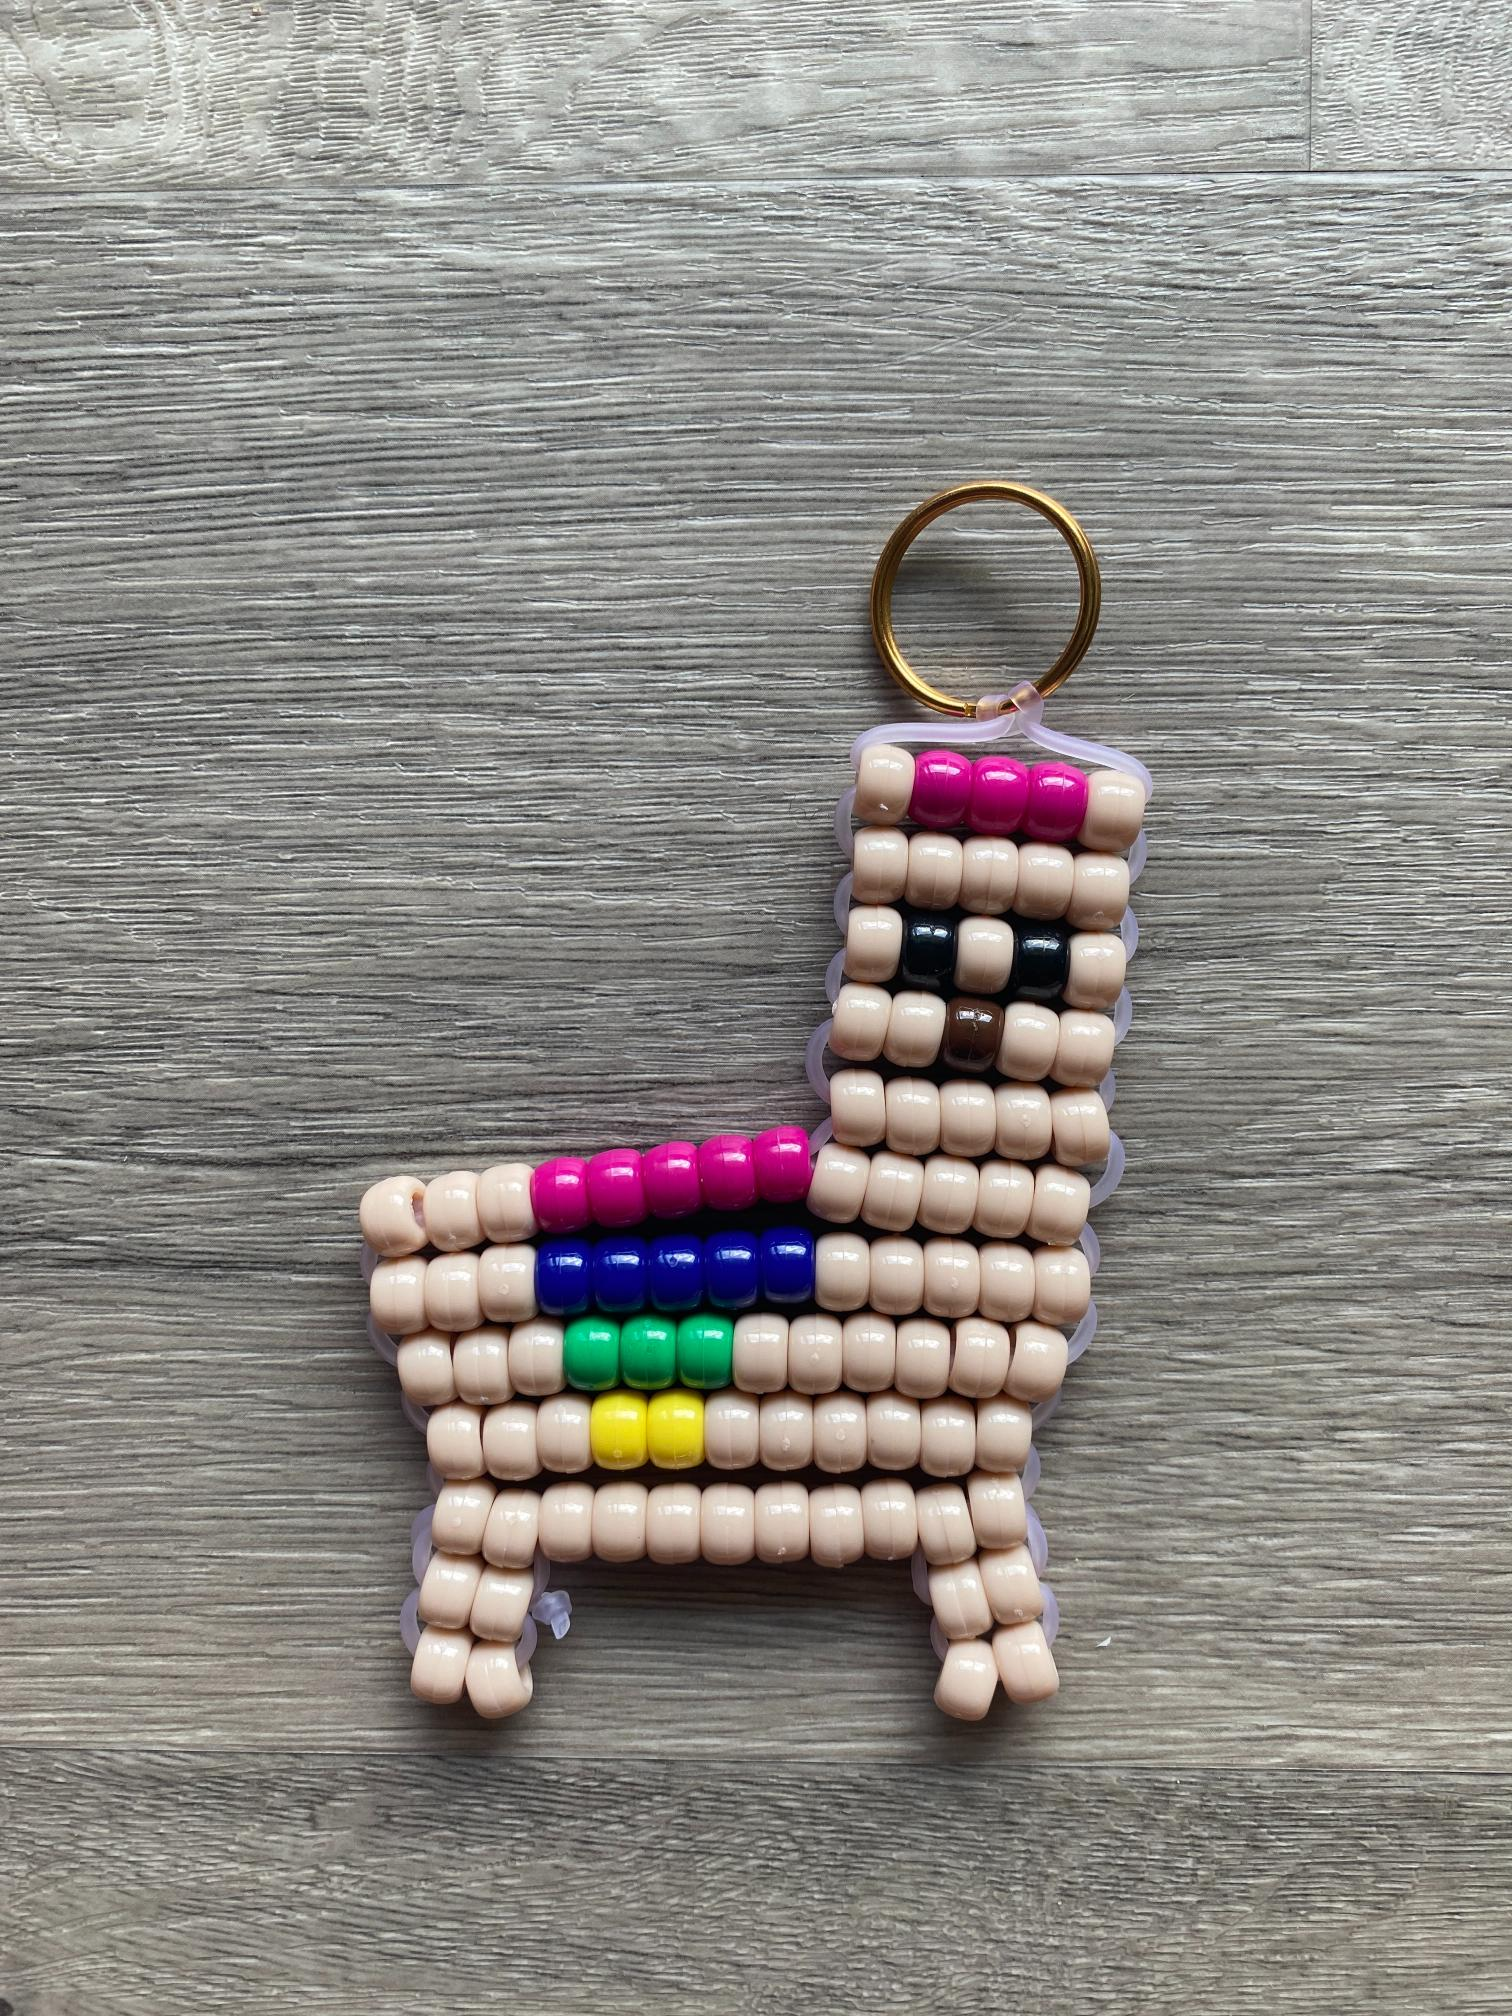
Use the photo below as a guide to lay out your pattern in pony beads.

Step 3: String the Beads
To begin adding the beads, string the top row onto the left lacing.

Then thread the right lacing up through all the beads.

Now pull the lacings in opposite directions until taut.

Step 4: Add More Rows
Move through your pattern from top to bottom. Continuing adding rows by following step 3 above until you reach the body.

Step 5: Form the Body
When you reach the body, string the five beads located under the head onto the right lacing.

Then string the remaining beads in that row onto the left lacing.

Now thread the right lacing through the beads on the left lacing.

Take one lacing (doesn’t matter which one) back through all the beads in that row, skipping the first bead on the left.

If you have trouble moving the lacing through the beads, try using a chopstick to push the lacing.
Step 6: Add More Rows
Now you should have a left lacing and right lacing again. Continue adding rows as you started in Step 3.
String the beads onto the the left lacing.

Thread the right lacing up through the beads, and pull both lacings until taut. Feel free to pull and stretch the lacing to make the rows take the shape you want.

Repeat to add more rows until you reach the feet.

Step 7: Create the Legs
To form the left leg, thread the top row of leg beads onto the left lacing. Then push the lacing through the two beads above the leg, from right to left.

Next, bring the lacing back through the two leg beads, from left to right. Then thread the final row for that leg onto the lacing.

Again loop the lacing around and through the two beads above, from left to right.

Then tie the lacing in a knot to secure it.
Repeat this step to add the right leg. After both lacings have been secured, trim any excess with craft scissors.
You made a llama pony bead keychain!
More Pony Bead Tutorials You’ll Love
If this llama keychain has you hooked on pony bead crafts, here are a few more projects to try next: