
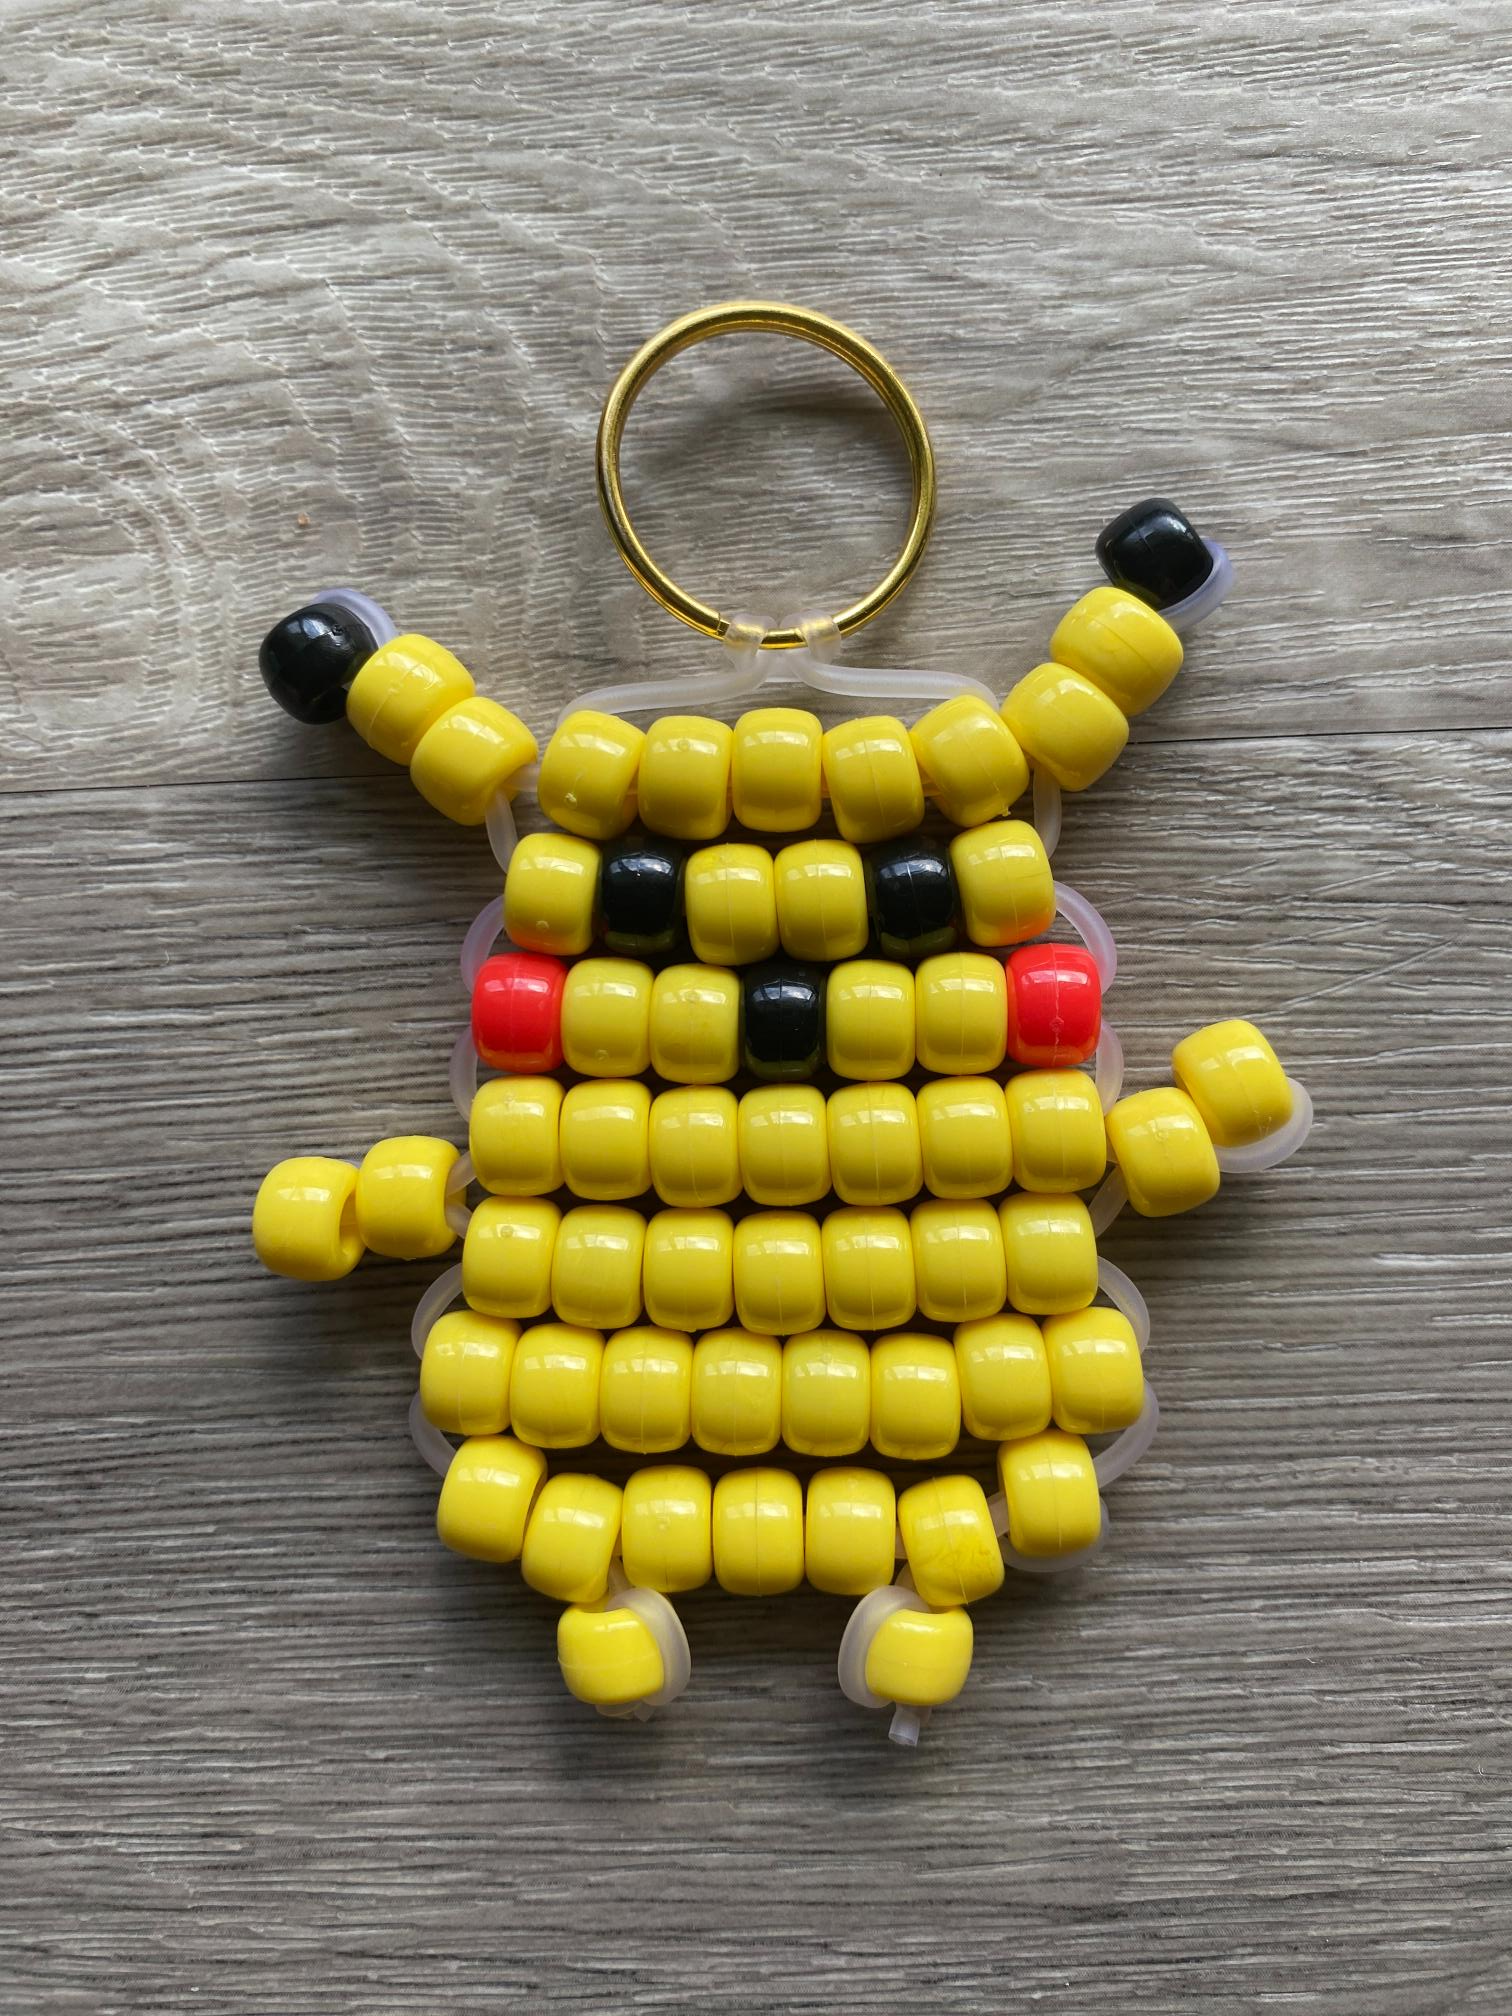
This pony bead Yellow Mouse bag charm is the perfect project for a craft night, a rainy afternoon, or any time you want to make something small and satisfying. When you’re done, clip it onto your backpack, purse, zipper pull, water bottle, or anywhere else that needs a little spark of joy. It also makes a fantastic handmade gift, especially if the recipient has very strong feelings about a certain electric rodent.
There’s a reason this little yellow guy has been the world’s most beloved pocket creature for nearly thirty years. He’s cheerful, iconic, and honestly? He deserves to go everywhere with you.
Quick Tips for Best Results
Sort your colors first. Yellow and cream beads look nearly identical in a pile. Get them separated before you start stringing so you don’t get three rows in and realize something’s off.
Work in good light. Black eye beads disappear fast in a dim room.
Keep tension even throughout. Check after every row. If something looks off, fix it before you move on. It only gets harder to correct once more rows are on top.
Use more lacing than you think you need. 60 inches sounds like a lot until you’re on the second-to-last row and running short. Give yourself the buffer.
If a row goes wrong, undo it right away. Pony bead mistakes are very forgiving when you catch them early. Once you’ve added two or three more rows on top, they become a much bigger headache.
Let’s make a pony bead Yellow Mouse bag charm!
Supplies

Before you get started, gather these supplies:
Step 1: Prepare Your Lacing
Cut approximately 60 inches of pony bead lacing. It’s always better to have too much than too little. You can trim the excess at the end, but you can’t add more once you’ve run out.

Fold the lacing in half and loop it through your keyring or clasp so both strands hang down evenly. This is the starting point for your charm.

Step 2: Lay Out Your Pattern
Before you start stringing, take a moment to lay out your beads in the pattern shape. This is worth doing! It lets you spot any color mistakes before they’re locked in, and it gives you a clear roadmap to follow as you work.

Step 3: String the First Rows
Begin by moving the beads for the ears away from the head. We’ll come back to those in a bit.

Now string the top row of the head onto the left lacing.

Thread the right lacing up through all the beads.

Then pull the lacings in opposite directions until taut. You want the row to lay fat. If they are too tight, your charm will curl; too loose and it will flop. Aim for firm but not forced.

Step 4: Add the Ears
Now let’s add the ears. String all three beads for the left ear onto the left lacing.

Take the end of the left lacing and thread it back through the yellow beads only.

Repeat to add the right ear.

Step 5: String More Rows
Thread the new top row onto the left lacing.

Then thread the right lacing up through the beads and pull both lacings taut.

This is the move you’ll repeat for every row: left strand adds the beads, right strand threads back through. Pull snug.
Step 6: Add the Arms
When you reach the row where the arms branch off, you’ll pause the main body to build each arm separately.
Thread the two beads for each arm on either side.

Loop each lacing back around and through one bead that is closest to the body.

Repeat that step for the other arm.

Step 7: Continuing Adding Rows
Once both arms are done, bring your strands back together and continue building the body rows as before.

Step 8: Add the Feet
After adding the bottom row of the body, thread each lacing back through the second bead on either side as shown below.

Thread a bead onto the left lacing to add the left foot.

Pull the left lacing around and back through the top of the foot bead.

Repeat this step to add the right foot.
Step 9: Tie and Secure
Tie a single knot at the bottom of each foot to secure the bead in place.

Step 10: Trim and Finish
Snip the remaining lacing close to the knots with your scissors. Give your charm a once-over: straighten any rows that got a little sideways, check that the arms are even, and make sure the knots are sitting neatly. Then clip it onto your bag and admire your work.

You made a pony bead Yellow Mouse bag charm!
Ways to Make It Your Own
Try different colorways. The classic yellow is iconic, but a shiny gold or a pastel yellow gives it a fresh look. There’s also a fan-favorite ice variant with white and light blue if you want to make a whole set.
Make it a pair. Make two charms and clip them side by side on the same keyring, one for you and one for a friend.

Add a lightning bolt. Cut a small lightning bolt shape out of craft foam in yellow and attach it alongside the charm. Extra points for accuracy.
Turn it into an ornament. Skip the lobster clasp and loop through a small jump ring instead to hang it from a Christmas tree or a holiday gift bag.
Make a whole team. Once you’ve got the two-strand technique down, you can adapt this same basic method to make an entire collection. The sky (and your bead supply) is the limit.
More Pony Bead Crafts
If you enjoyed this tutorial, here are a few more to try next: