
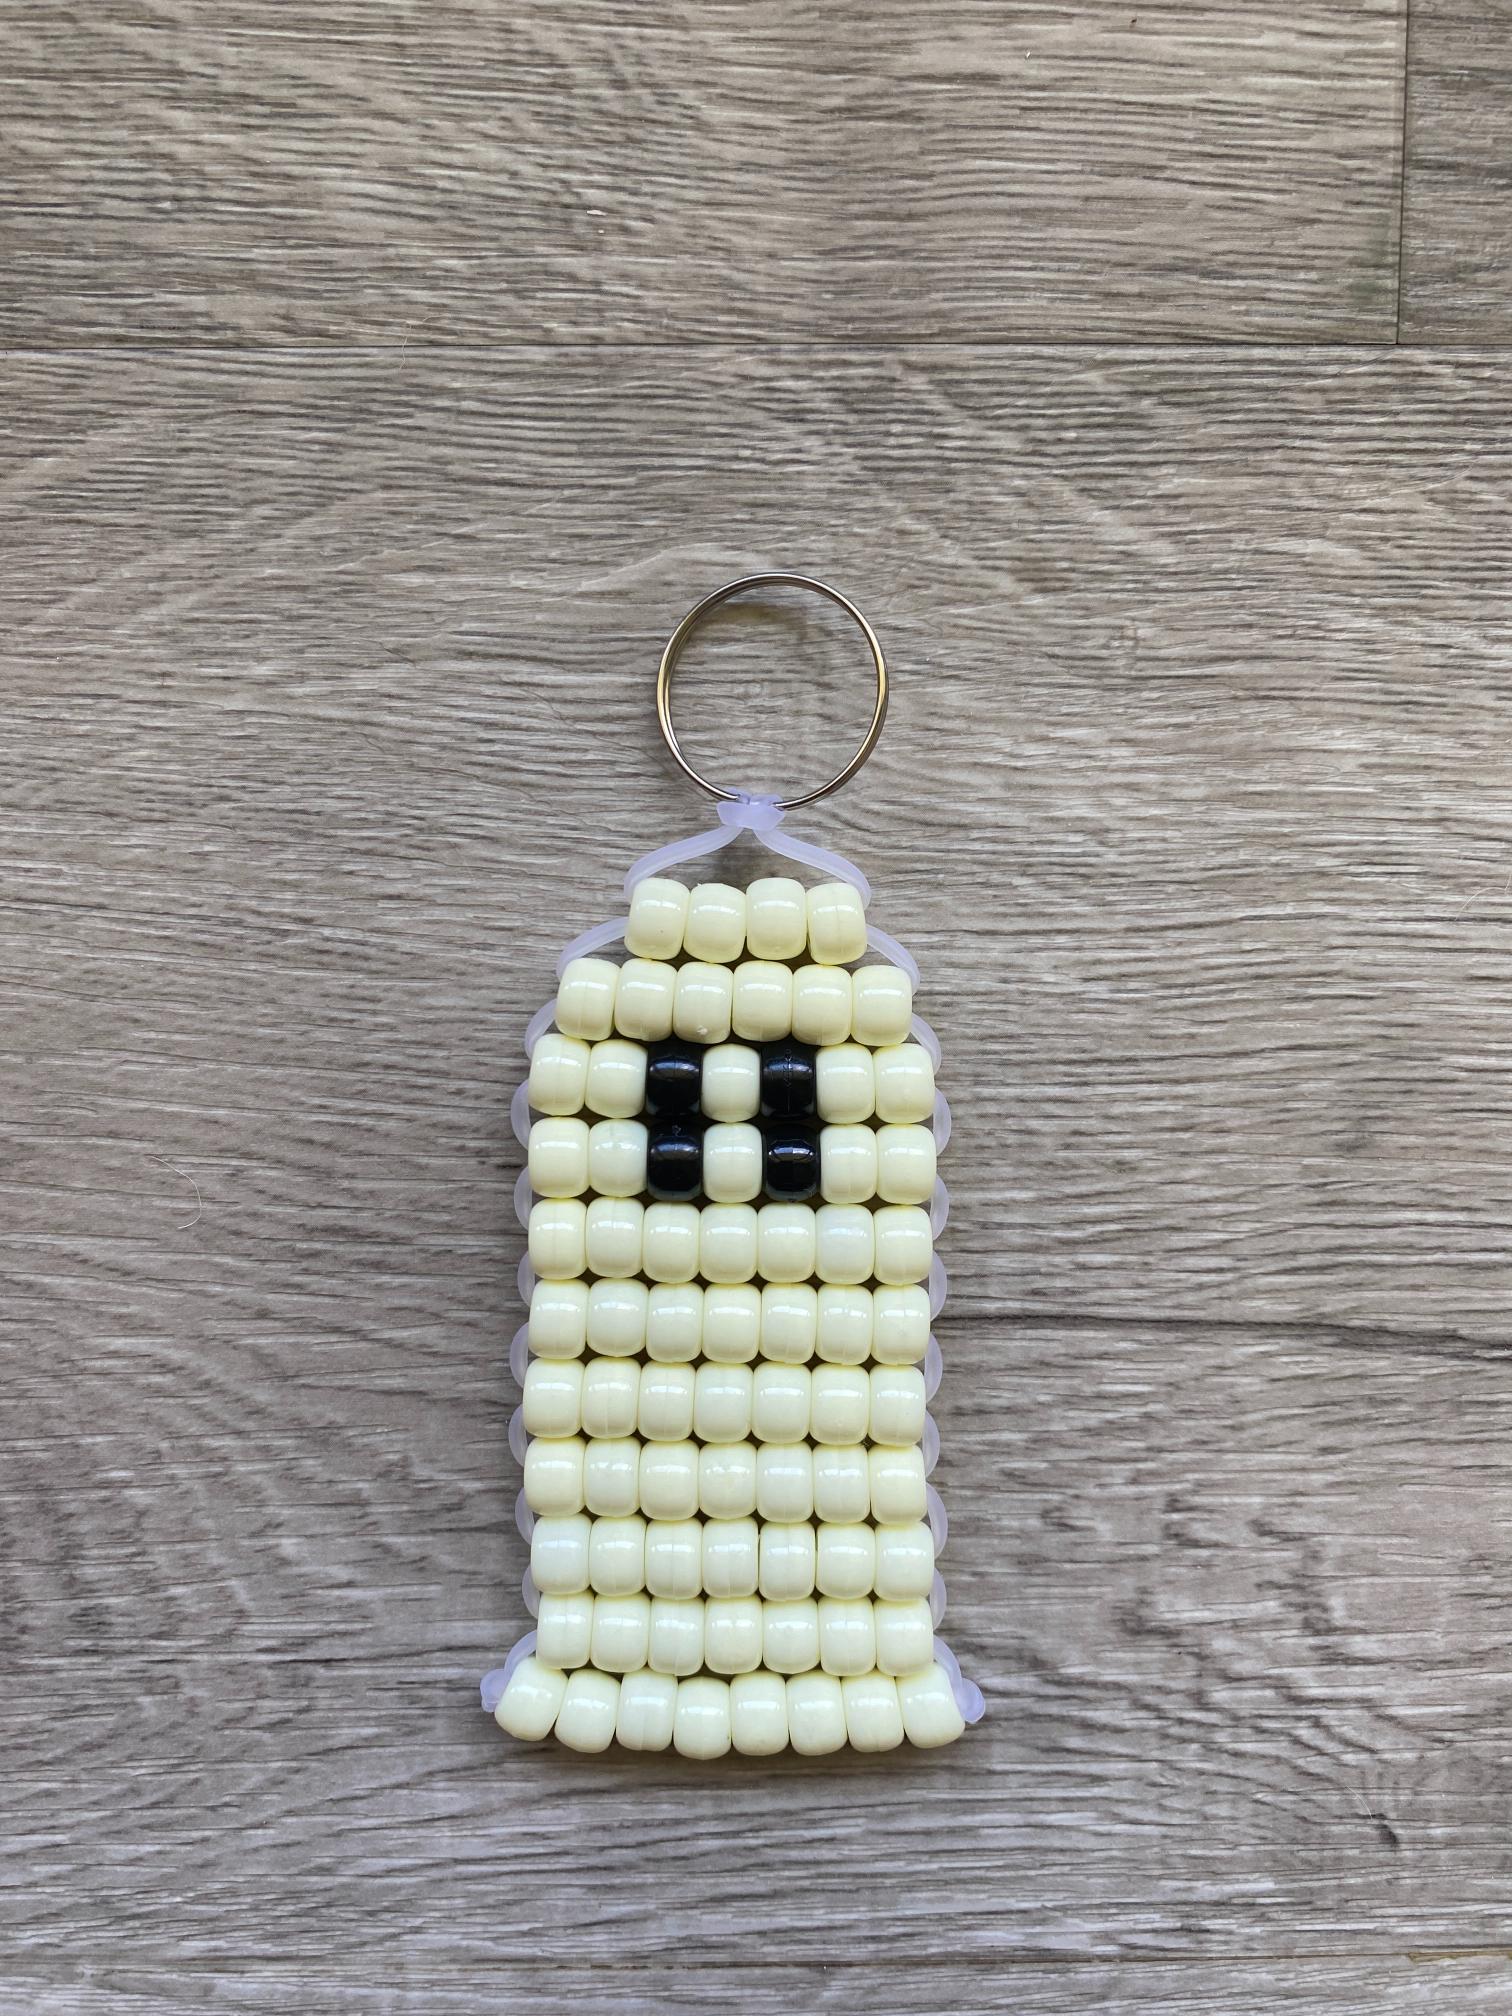
The pony bead ghost is about as simple as this hobby gets: a basic rounded shape, one main color, and just a couple of little details for the eyes. It’s proof that you don’t need a complicated pattern to make something genuinely cute.
This is the charm I’d hand to someone making their very first bag charm. There’s no long tail, no separate pieces to join, no tricky color-counting. If you’ve been intimidated by some of the more detailed animal patterns, this is your sign to jump in with the ghost first.
Color Scheme Ideas
Classic white is the go-to, but a few twists are just as cute:
- Classic Ghost – white body with black beads for the eyes and mouth
- Pastel Ghost – soft lavender or mint for a sweet, non-spooky version
- Glow Ghost – glow-in-the-dark beads for a charm that lights up after dark
- Sparkle Ghost – white glitter beads for extra shimmer
- Rainbow Ghost – swap the white base for a bright, unexpected color
- Spooky Ghost – deep purple or black body for a more Halloween-forward look
Supplies You’ll Need

Here’s everything you’ll need to create this simple craft. Grab the exact supplies below:
How to Make a Pony Bead Ghost
Step 1: Prepare the Lacing
Begin by measuring 150 centimeters of pony bead lacing. Cut it to length with craft scissors.

Then fold the lacing in half and pull it through the key ring or lobster clasp, forming a lark’s head knot.

Now you have two equal lengths of pony bead lacing to work with, a left and a right.
Step 2: Lay Out the Pattern
Use the photo below to lay out your pattern in pony beads on a flat surface. Get creative with colors to design your own unique ghost.

Step 3: String the Beads
Start by stringing the top row of beads onto the left lacing.

Then thread the right lacing up through the beads.

Pull the lacings in opposite directions until the beads form a horizontal row just under the knot.

Step 4: Add More Rows
Now string the second row of beads onto the left lacing.

Again thread the right lacing up through the beads, and pull in opposite directions until taut. Then add the third row.

Continue repeating these steps to work through the pattern, adding rows from top to bottom.

Repeat the process until all the beads are strung.

Step 5: Secure the Lacing
Now loop each lacing through the row above. Tie them in single knots to secure everything in place.

Step 6: Trim Excess Lacing
Finally, use craft scissors to cut off the excess lacing just below each knot.

You made a pony bead ghost!

More Pony Bead Patterns You’ll Love
If you had fun with this one, check out these other pony bead tutorials on the blog: