
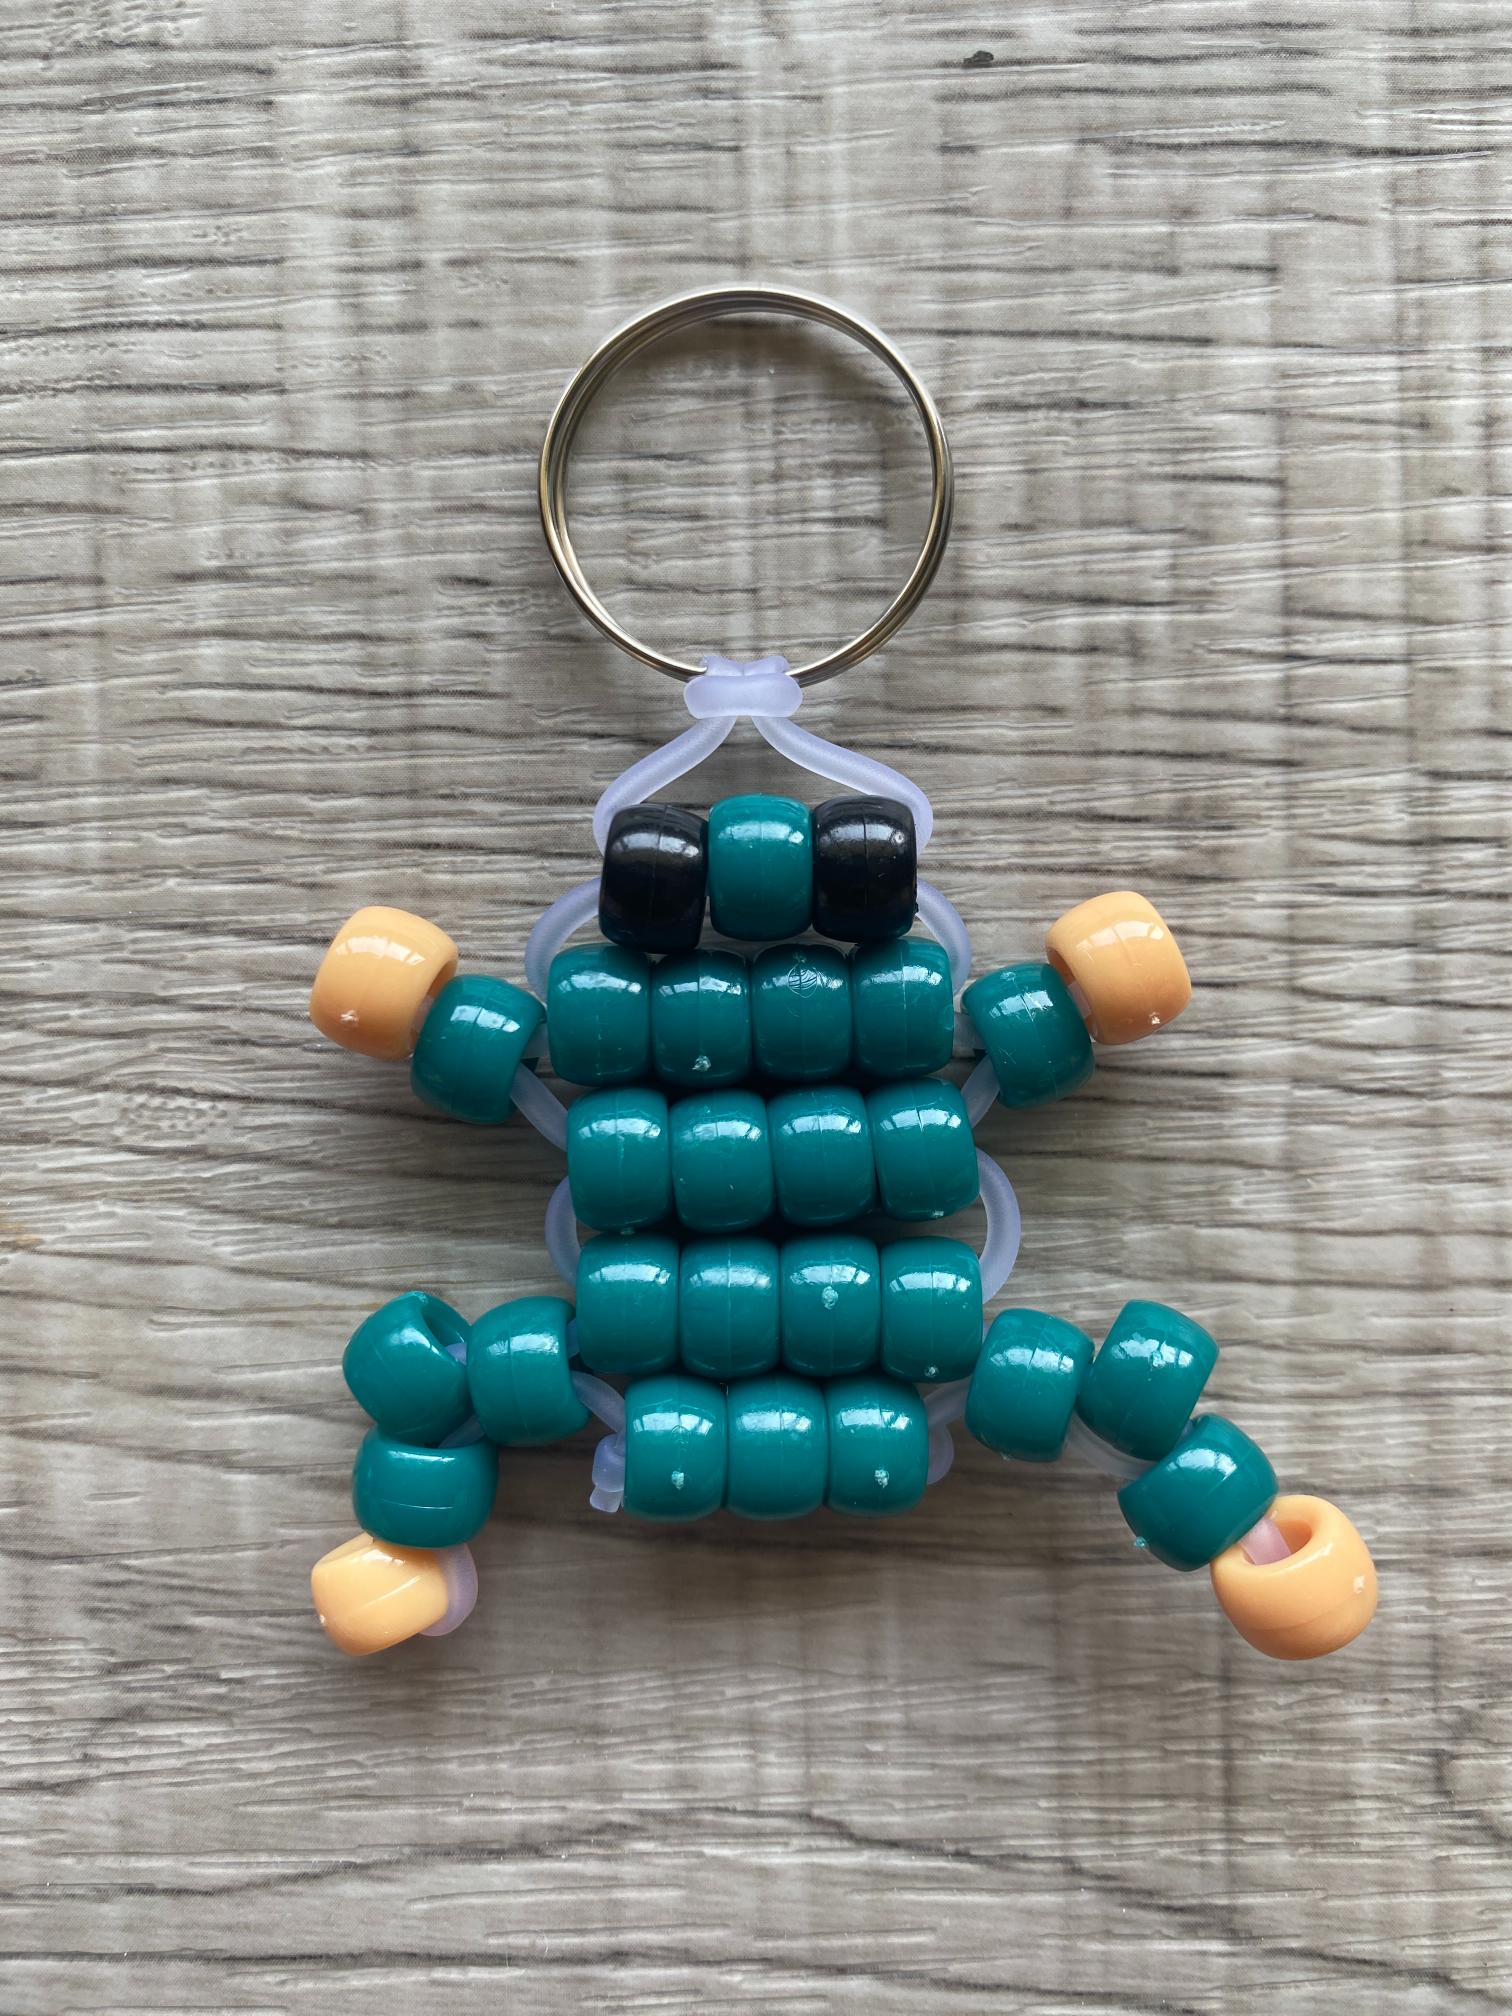
If you’ve been hopping around looking for your next pony bead project, you’re going to love this sweet little pony bead frog that’s just as fun to make as it is to show off. Whether you’re clipping it onto a backpack, turning it into a keychain, or adding it to your growing bag charm collection, this pattern is beginner-friendly and works up fast.
Pony bead animals are one of the most popular categories in the kandi and bead-crafting community right now, and frogs are a perfect pick. They’re bright, cheerful, and instantly recognizable. This is a great project whether you’re just starting out or looking for something quick to add to your shop or gift stash.
Why You’ll Love This Pattern
- It’s budget-friendly
- Small enough to finish in one sitting
- Works great as a bag charm, keychain, zipper pull, or magnet
- Easy to customize with different color combos

Color Scheme Ideas
One of the best parts of this pony bead frog pattern is how easy it is to make it your own just by switching up the beads. Here are a few color combos to try:
- Classic Tree Frog – bright green body with a white belly and black eyes
- Poison Dart Frog – bold blue or yellow with black accent spots
- Toad Style – earthy brown and tan tones with a cream belly
- Pastel Frog – mint green and lavender for a softer, spring-ready look
- Glow-Up Frog – neon green or UV pony beads for a charm that pops under blacklight
- Sports Team Frog – swap in your favorite team’s colors for a fun personalized gift
If you’re not sure where to start, pull up a photo of your favorite real-life frog species for inspiration. Poison dart frogs especially are a goldmine of bold, eye-catching color combos.
Supplies You’ll Need

Here’s everything you’ll want to have on hand before you get started. These are the exact supplies used in this project. Grab them below:
How to Make a Pony Bead Frog
Step 1: Prepare the Lacing
Start by measuring 90 centimeters of pony bead lacing.

Use craft scissors to cut the lacing to length.

Then fold the lacing in half and pull it through the key ring or lobster clasp to form a lark’s head knot.
Step 2: Lay Out the Pattern
Next, use the photo below to lay out your pattern in pony beads. This is when you can experiment with different colors until your frog is exactly the way you want it.

Step 3: String the Pony Beads
We’ll work through the pattern from top to bottom. Begin by stringing the top row of pony beads onto the left lacing.

Then thread the right lacing up through the beads.

Now pull the lacings in opposite directions until the beads form a horizontal row just under the knot.

This is called the ladder stitch. Repeat this step to add the second row.

Step 4: Add the Arms
To add the left arm, string both beads of the arm in your pattern onto the left lacing.

Then loop the left lacing around and back through the bead closest to the head.

Repeat this step to add the right arm to the right lacing.

Step 5: Form the Body
String the next row of beads the same way you added the first two. Place the beads onto the left lacing.

Thread the right lacing up through beads and pull in opposite directions until a row forms just under the arms.

Repeat this step to add the next row.
Step 6: Create the Legs
To add the left leg, string all beads in your pattern for the leg onto the left lacing.

Now loop the left lacing around and back through the second and fourth beads, skipping the third.

Repeat this step to add the right leg to the right lacing.

Step 7: Add the Final Row
Add the final row as you added each row before – string on the left lacing, thread up with the right and pull taut.

Step 8: Secure the Lacing
To secure the lacing, loop each one through the row above and tie it in a single knot.

Step 9: Trim Excess Lacing
Trim away any excess lacing using craft scissors.

You made a pony bead frog!
More Pony Bead Patterns You’ll Love
If you had fun with this one, check out these other pony bead tutorials on the blog: