Whether you’re a beginner looking for a fun first project or an experienced crafter searching for something new, bead animals are always a hit. In this tutorial, we’ll be making a pony bead fish bag charm. It’s a simple yet eye-catching project that you can turn into a keychain, bag charm, or even an ornament.

Fish make great beginner bead projects because their shape is straightforward, yet there’s still plenty of room to play with colors and patterns. You can keep it simple with solid colors, or get creative with stripes, rainbow designs, or even translucent beads to mimic scales. Plus, fish are small enough that you can complete the project in one sitting, which makes this tutorial especially satisfying.
Why Kids (and Adults) Love This Project
Bead crafts are fantastic for building fine motor skills, teaching patience, and encouraging creativity. Kids love the instant reward of seeing their animal take shape row by row, while adults often find the process relaxing. It’s like a colorful form of meditation. Plus, the finished fish is durable enough to hang on a backpack, keyring, or even as a car mirror charm.
Supplies You’ll Need
Before you get started, gather the following supplies:
- Pony beads in at least two colors (for the fish body and an accent color)
- Pony Bead Lacing (60″ long)
- Scissors
- Ruler
- Keyring or lobster clasp (optional) if you want to make a charm

I recommend using pony beads because they’re large, inexpensive, and easy to handle. If you want a smaller fish, you can use seed beads, but be prepared for a more delicate project.
Step 1: Prepare Your Lacing
Cut about 60″ of Pony Bead Lacing. This might seem like more than you need, but it’s always better to start with extra.

Fold the lacing in half so you know where the center is. Then pull it through the key ring to secure it.

Step 2: Lay Out Your Pattern
Use the photo below to lay out your pattern in pony beads. Feel free to experiment with different colors and get creative.

Step 3: String the Beads
Begin by stringing the top row of beads onto the left lacing.

Then thread the right lacing up through the beads.

Now pull the lacings in opposite directions.

Continue pulling until taut where the beads are in place. Avoid pulling too tight or stretching the lacing. These will cause the rows of beads to curl up.

Step 4: Add More Rows
Continue adding rows of beads by repeating Step 3. Move from top to bottom through the pattern.

Repeat, repeat, repeat until all your beads are strung.

Step 5: Secure the Ends
Tie each lacing in a knot to secure. A single knot is fine when working with Pony Bead Lacing.

Pull the knots taut, but again, not so tight that it makes the beads roll up.

Step 6: Trim Excess Lacing
Use craft scissors to trim any excess lacing away from the knots.

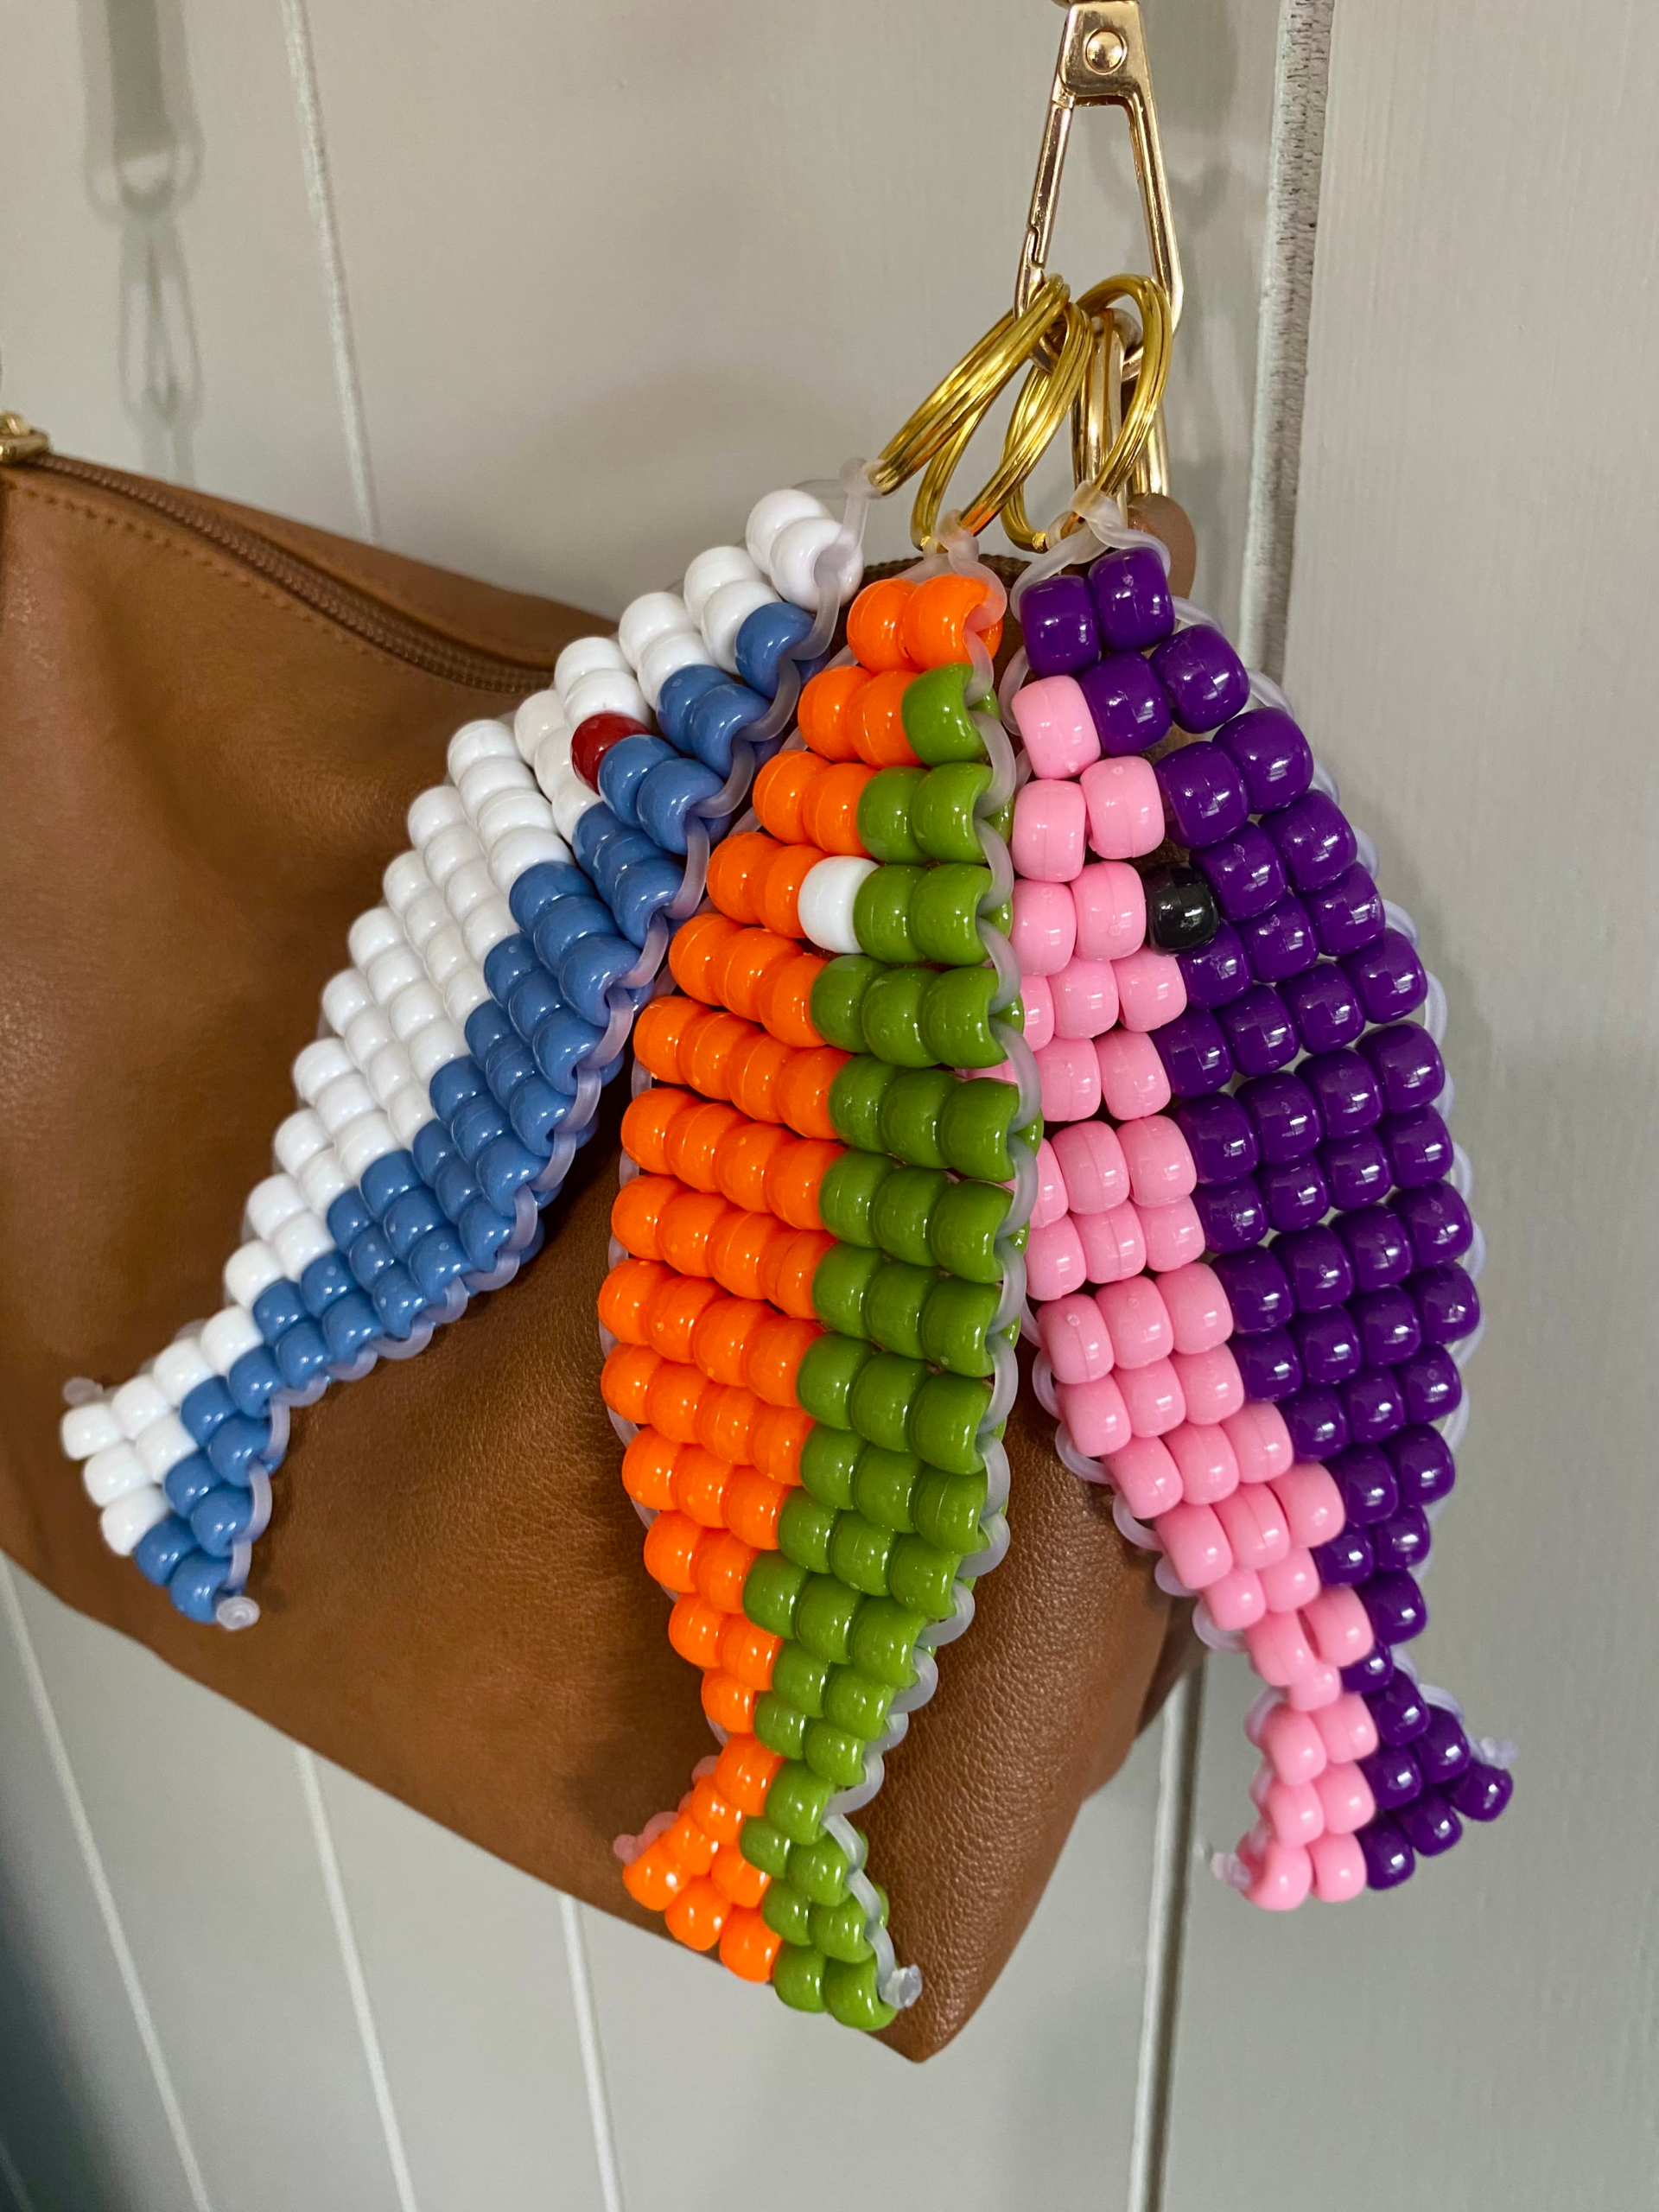
You made a pony bead fish bag charm! Add it to your boat tote, key ring or purse for a touch of everyday whimsy.
Tips for Success
- Work with contrasting colors. It helps the details of your fish stand out. For example, use a bright body color with darker eyes.
- Pull lacing evenly. This keeps your rows straight and prevents the fish from looking lopsided.
- Experiment with patterns. Try stripes, polka dots, or even rainbow rows.
- Use a bead tray. Keeping beads organized by color makes crafting smoother, especially if you’re working with kids.
- Practice patience. The weaving technique might feel tricky at first, but once you get the hang of threading both cords, it becomes second nature.

Variations to Try
Once you’ve mastered the basic fish, try changing things up:
- Mini Fish: Use smaller beads like seed beads for a daintier version.
- Tropical Fish: Mix bright colors like orange, yellow, and blue for a bold look.
- Glitter Fish: Use translucent or sparkly beads to mimic shiny fish scales.
- School of Fish: Make several small fish and attach them together for a decorative garland.
Making a beaded fish is a fun and approachable project that anyone can enjoy. With just a handful of supplies and a little bit of time, you can create something bright, playful, and uniquely yours.

Happy crafting, and may your beaded fish swim its way into your heart (and maybe even onto your bag or keychain)!
Comments
One response
[…] you’re brand new to pony bead animals or you’ve already made classics like the lizard or fish, this project is a wonderful way to expand your […]